
Last Updated on March 16, 2024 by Bonnie
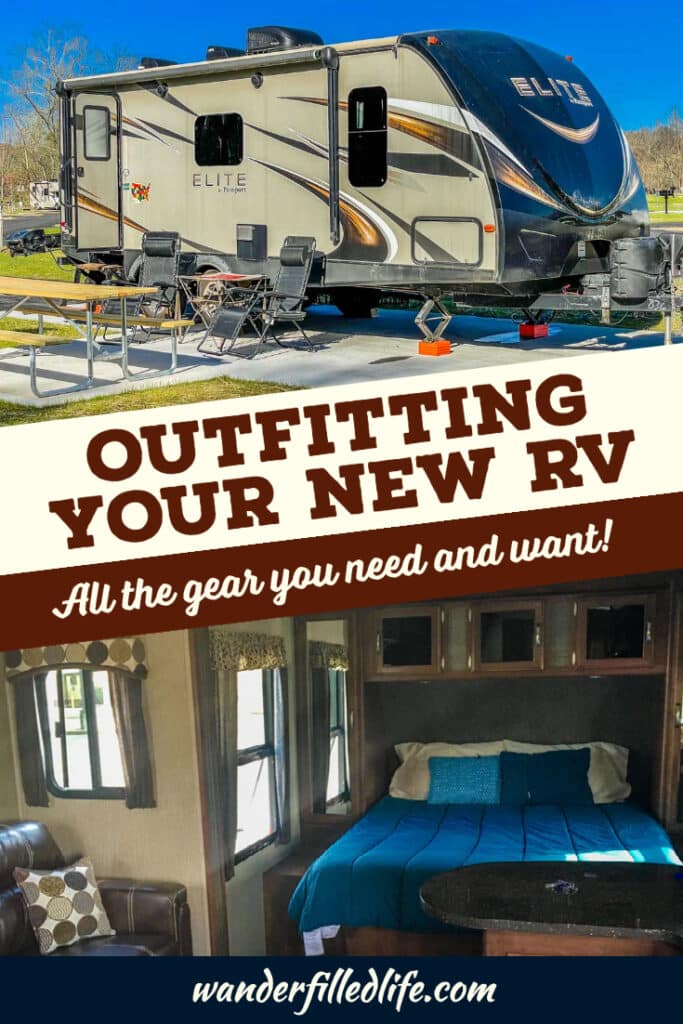
So, you bought a camper. And now you are outfitting a new RV! Seriously, get excited because you are joining a great community and there are some seriously awesome times ahead of you! But first, you need to outfit your RV. Yep, that means getting a lot of gear. Don’t worry! Bonnie and I have you covered.
We bought our first camper back in March 2016, took
Read about our experience buying our first RV.
Instead of leaving you to find out what works best for the RV and go search for a place to buy it, I have compiled a gear list for you and linked it all to Amazon. In general, we shop a lot at Amazon. We have Amazon Prime for two-day shipping and we have the Amazon Prime Rewards Credit Card, both of which we love. When you combine the two, you get 5% off your purchases at Amazon and the added bonus of 2% back at gas stations.
(Disclaimer: When we link to places where you can buy our stuff or places we stayed, we are using special codes that earn us commissions on the sales at no additional cost to you. Please see our Review Policy for more information.)
Outfitting a New RV: Exterior Gear
When it comes to outfitting a new RV, I have broken up our guide into two sections: one concerning the outside of the camper and the other part dealing with the inside of the camper.
This section covers all of the stuff you need to tow your camper and set it up at the campground, including hitch, levelers, and utility connections.
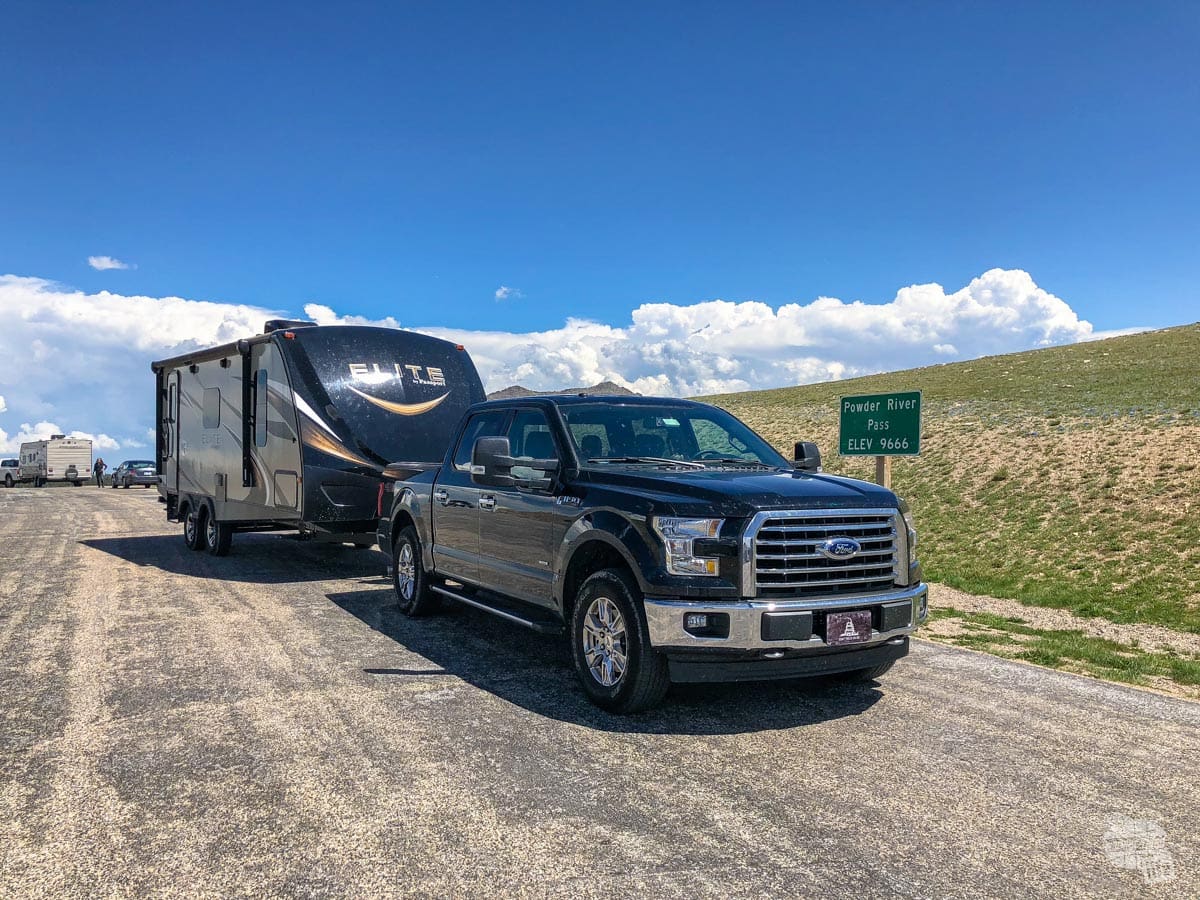
Hitch
Your hitch is one of the most important pieces of gear you can get and keeping everything about your hitch working properly is one of the best ways of reducing headaches.
Hitches for a travel trailer are very much a matter of personal preference. I suggest most folks towing a travel trailer should get some sort of weight-distributing hitch with sway control. It helps keep the back end of your truck from sagging and keeps the trailer from swaying all over the place.
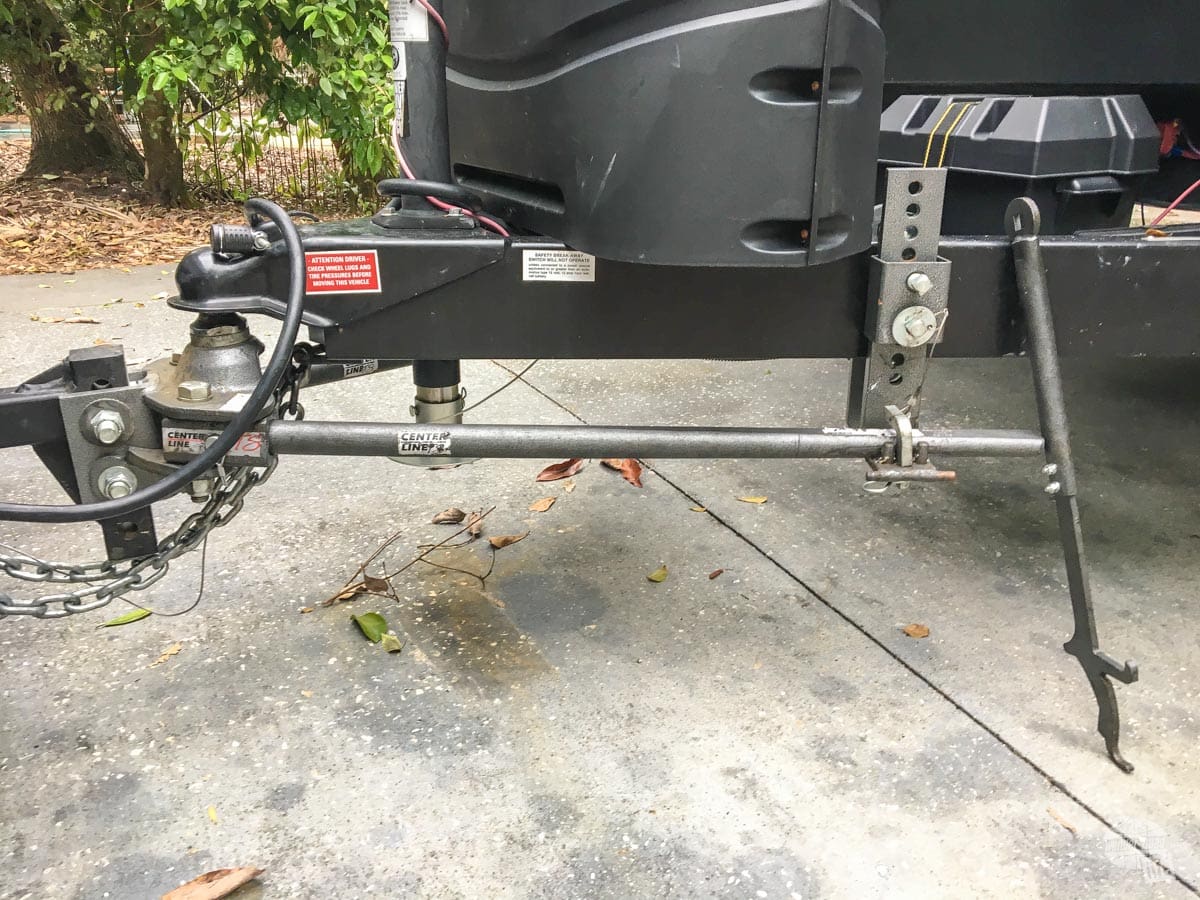
I use the Husky Centerline TS because it is fairly easy to use, does not need to be disconnected when making tight turns and has worked like a champ for us.
That said, there is plenty of discussion in RV forums on other brands out there. The reason I have this particular hitch? This is what the dealer I bought my camper from carried and I got them to toss it in for the price of the camper! After more than seven years of towing with it, I recommend it.

Gear for Your Hitch
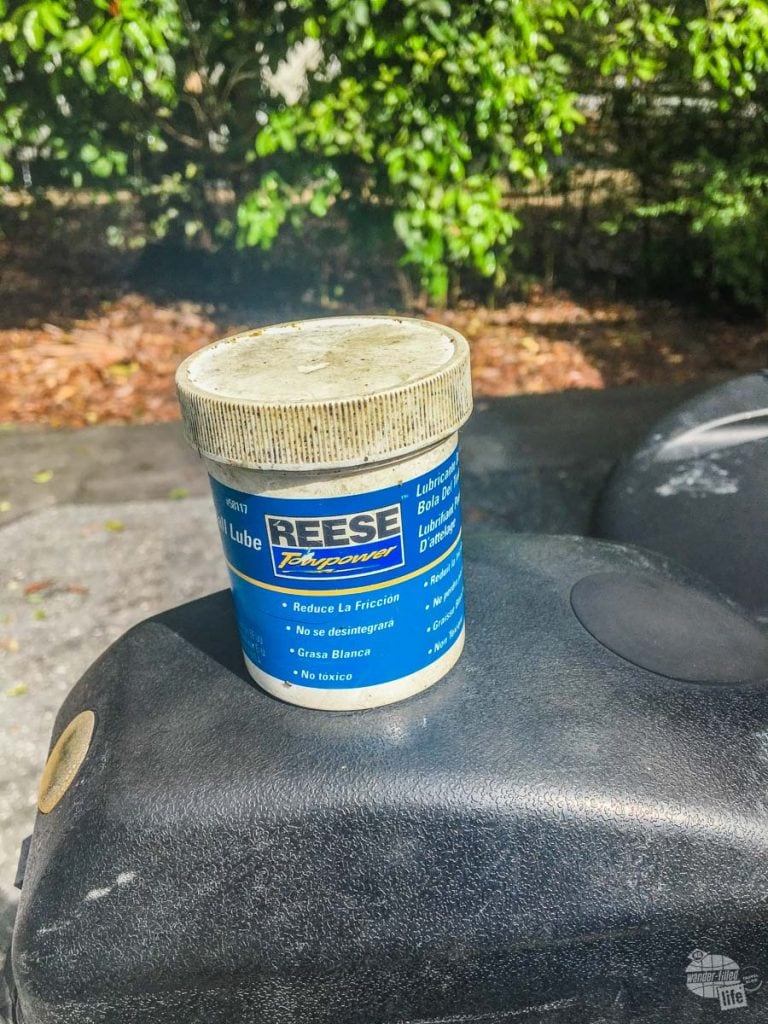

Hitch Lube
Regardless of which hitch you get, get some hitch lube! I use Reese Towpower Hitch Ball Lube. It reduces noise and keeps everything moving smoothly on the various components of the hitch. Be sure you follow the manufacturer’s instructions on what to lube!

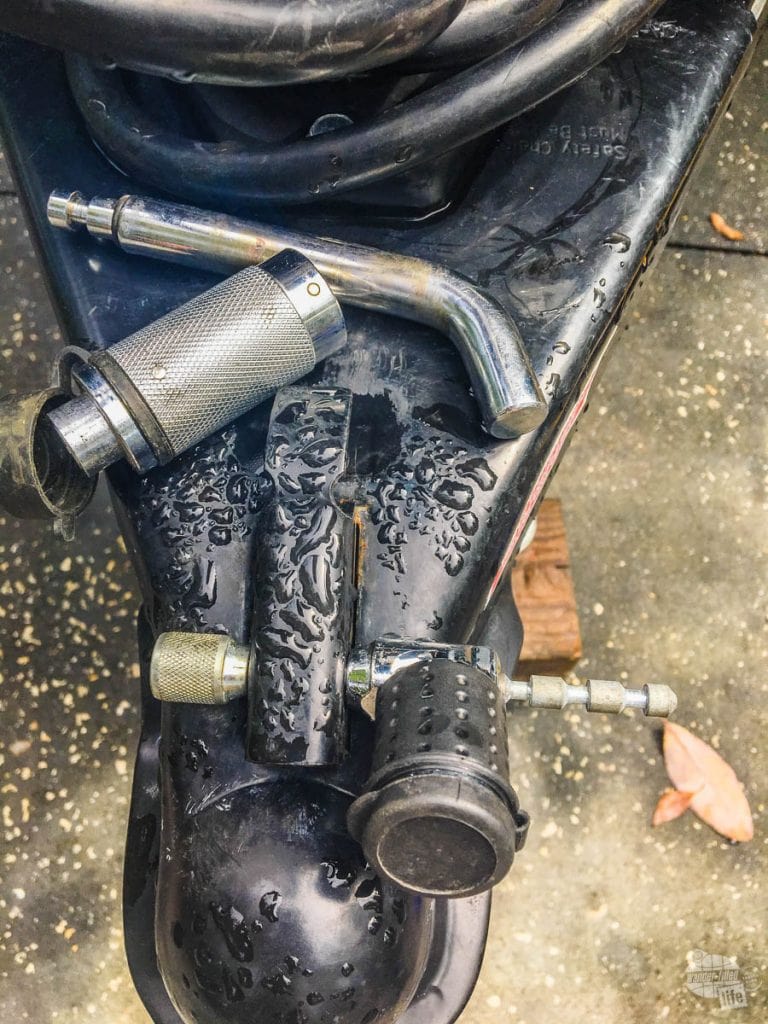
Hitch Ball Cover
Once you lube up your ball, you are gonna need to cover
Another, easier and cheaper trick is to grab hold of the hitch ball with a dirty, rubber-gloved hand. While you are holding on to the ball, pull the glove off your hand and onto the ball. That will cover the ball and prevent getting grease everywhere.

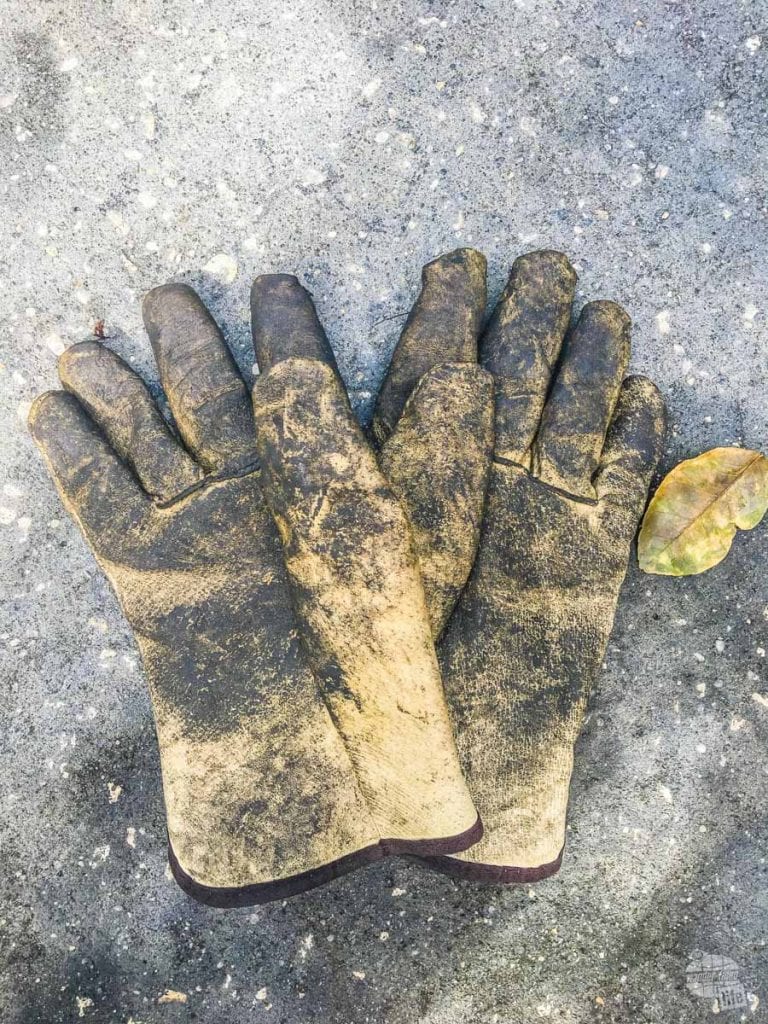
Leather Work Gloves
Work gloves are mighty handy for keeping your hands clean and not torn up. Trust me on this, you are gonna want leather work gloves when it comes to dealing with the hitch, among other things. The hitch is heavy and it will tear up your hands, plus the grease is, well… greasy.

Hitch locks
So, you bought your beautiful new trailer and expensive hitch… Are you really going to leave them unlocked when you park it? Nah, didn’t think so. We replaced our locks with this two-piece system. Why? Because one key is better than two keys!

Gear for Your Tires

Tires keep you rolling (pun intended) and you both need to take care of them and prepare for their failure.
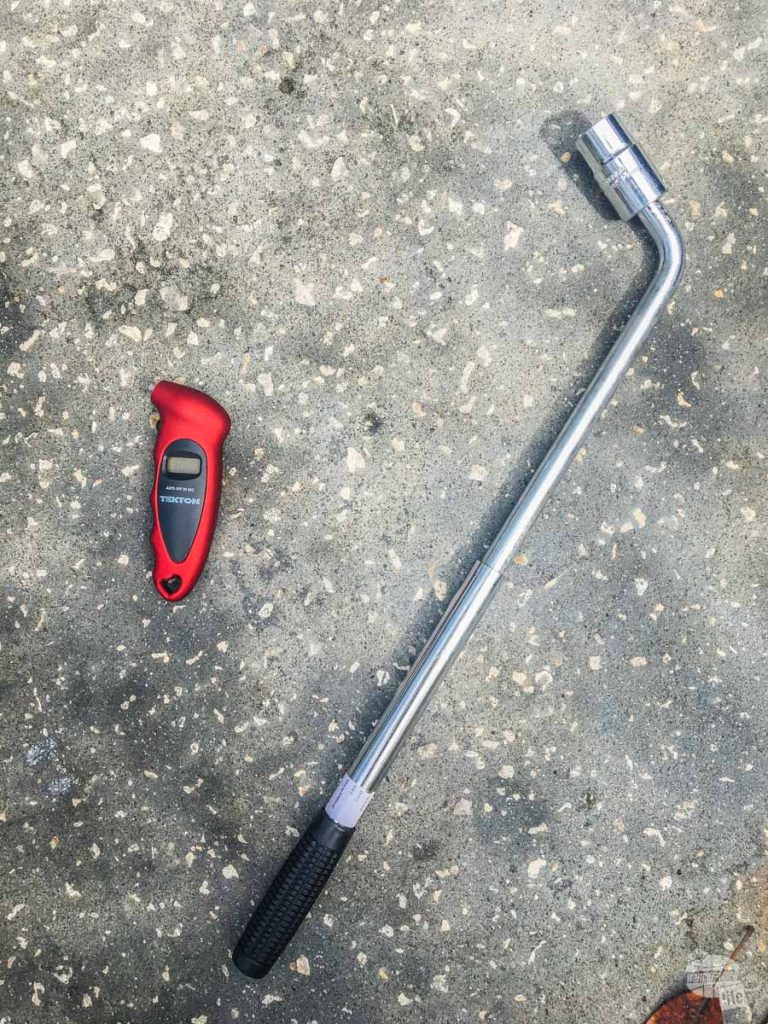
Tire Gauge and Lug Wrench
First and foremost, get yourself a decent tire gauge. You will need it, period. Next, get yourself a lug wrench that will actually generate enough torque to unscrew a lug nut. This is what I have in my truck right now.

Trailer-Aid
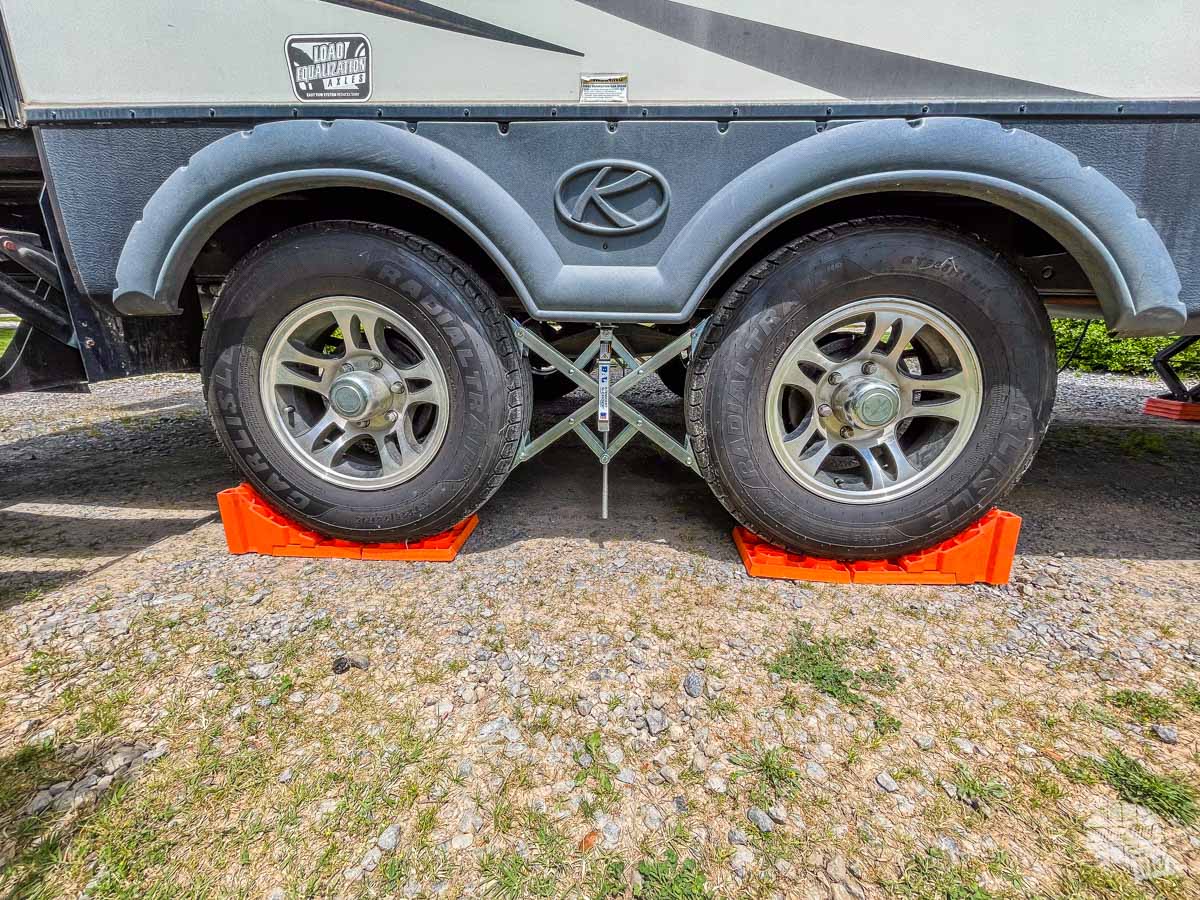
We tried to use our Trailer-Aid and were a bit disappointed. While it got close, it did not quite get the other wheel off the ground when changing a tire. This was due to the spacing of our axles. If you have a Keystone camper, as we do, you might want to skip the Trailer-Aid. If you don’t have such widely-spaced axels, this would work like a charm. Still, we highly suggest testing it before relying upon it.

An alternative we found is using a LOT of Lynx Levelers to get the wheel high enough off the ground to change it. It is the same concept and we were able to get it high enough to change out the tire. A Trailer-Aid would be easier if you can make it work for your trailer.
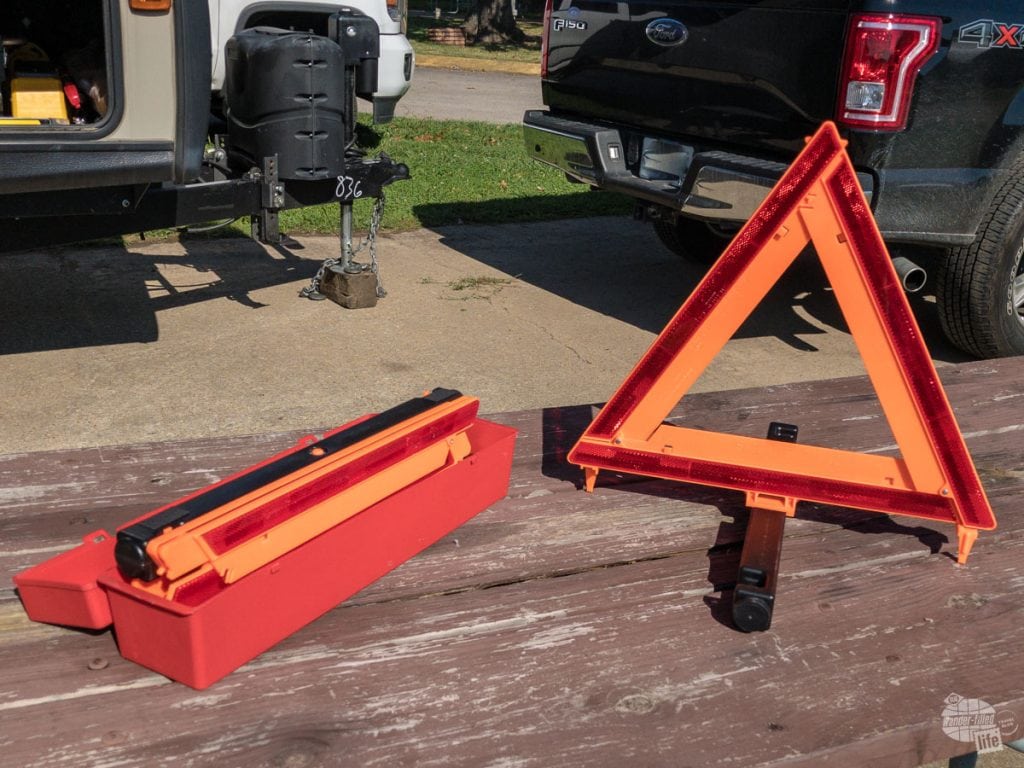
Safety Markers
These are simple reflective caution triangles you use if you break down on the side of the road. It’s a small price to warn someone at night before they plow into your trailer.

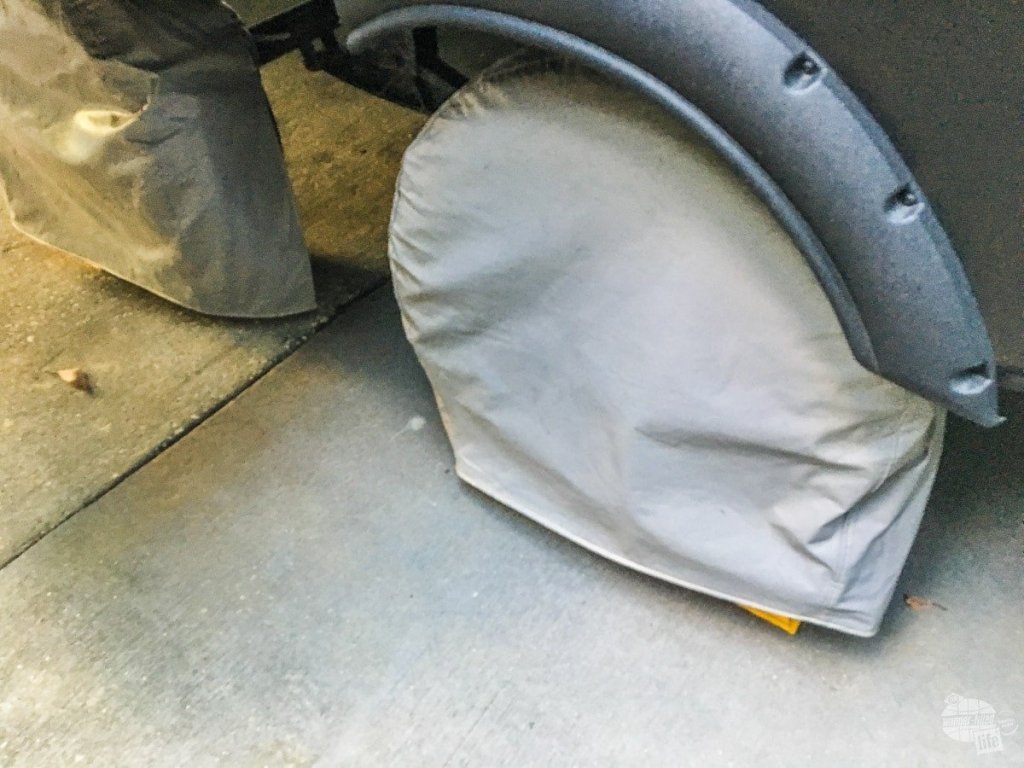
Tire Covers
If you are going to be storing your RV for any period of time, you want to protect the tires with covers. These go on easy and fold up just as easily. They protect your tires from UV damage while they are being stored.

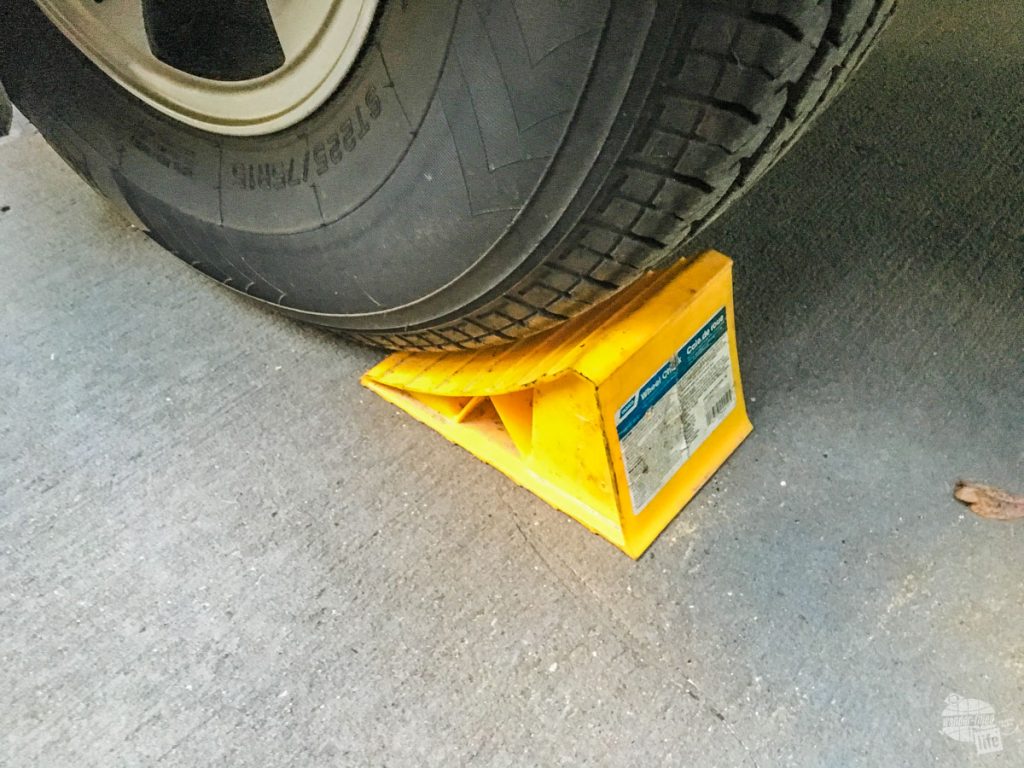
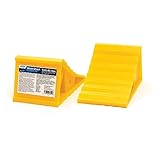
Chocks
These are simple, yellow chocks that will keep your trailer from rolling. Get four of them (two packs of two). You can get more robust chocks if you feel you need them but we have never needed more than these for keeping the camper in one place.
Leveling Gear
It does not matter how much the campground advertises having level sites, they likely won’t be. You will need to level your trailer at least a little pretty much every time you camp. If you’re like us and don’t have a self-leveling system, that means you’re doing it manually.
Sometimes, it will be easy. Sometimes, it will be hard. The gizmos below will help make the process better.
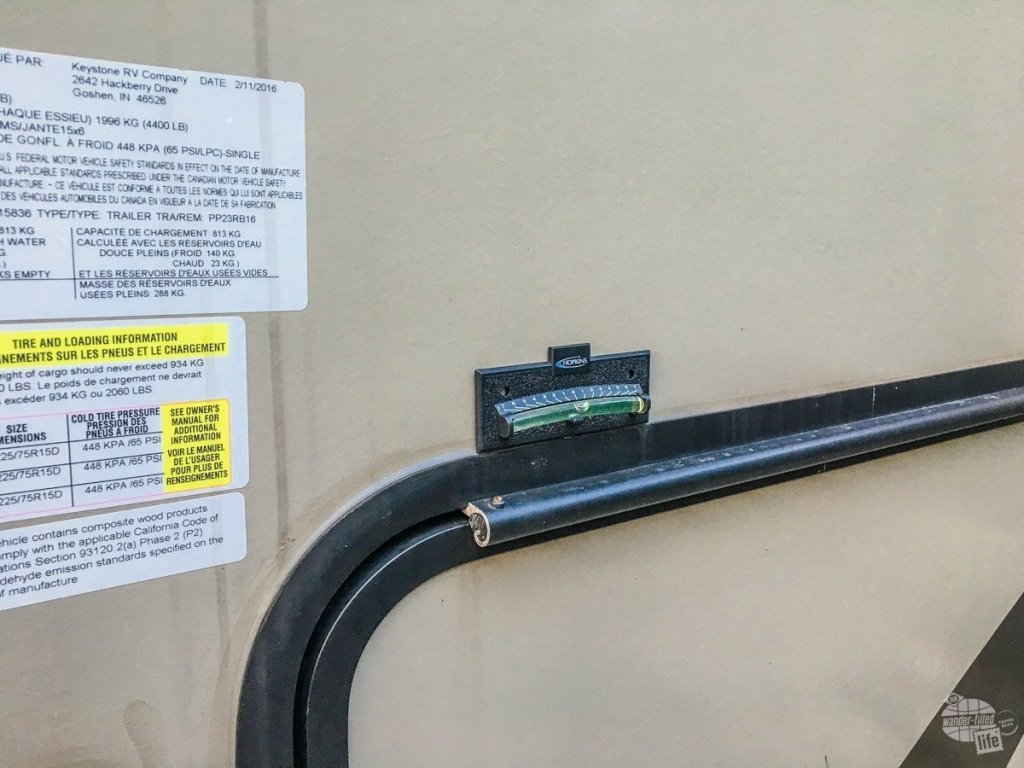
Level
Ok, so the first time you level your camper, you are going to want to use a nice carpenter’s level to make sure it is squared away. Once you do that, stick these bubble levels on the outside of your camper, near the front. They will tell you how many inches the camper needs to come up to be level.

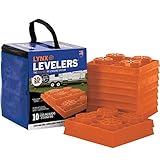
Lynx Levelers, Caps and Stop n’ Chocks
Once you figured out how much you need to level, lay these plastic leveling blocks down and drive the trailer up onto them. The cool thing is one layer of them is supposed to be one inch on the bubble level. It isn’t always perfect but it takes a lot of the guesswork out of the process.
I know some folks will haul 1”x4” scraps to level with. I am not a fan of using 1″x4″s for a few reasons: 1) Lynx Levelers are plastic and won’t rot and 2) they work like LEGOs and won’t slide.
I suggest getting three bags of 10 of these. We started with two bags and ran out in a couple of places leveling our camper and supporting the stabilizing jacks our first year. Since then, three bags
Lynx Caps go on top of the levelers to protect the “LEGO” connectors. They are great as stabilizer pads and can be used by themselves for leveling small amounts.
That said, with the above levelers and a cap, the “one level for one inch off” rule may not be quite exact. With a little practice, you’ll learn to read the gauge and determine what you need. Get two packs of four of the Lynx Caps.
Stop n’ Chocks link into the Lynx Leveler to secure your trailer on the levels. Get one pack of two. I had a total of four and never used the other two. I ended up giving the other two away.
You can even use Lynx Levelers to help you change a tire!


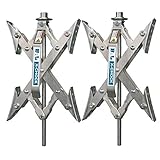
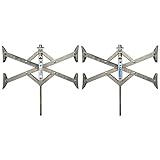
X-Chocks
A new addition to our camping gear is X-Chocks. These metal contraptions spread between the wheels on your camper to prevent your wheels from moving. They add a lot of stability to your camper, even more than the stabilizing jacks themselves.
I will be honest, putting them on the first time is a bit of a hassle. It takes a lot of trial and error to get them on. That said, once you get them on, you just need to loosen them a small amount to take them off, which will make putting them on a second time a lot easier.
We had to order the extended version of X-Chocks so they would fit our Keystone trailer, which has wider than normal axle separation. Once we got them installed, we noticed a significant difference in the stability of our rig. These are well worth the price.
Ryobi One+ Gear
Home Depot’s house brand of power tools, Ryobi One+, makes a ton of different tools that all use the same rechargeable battery. They are reasonably priced and, if something breaks, you can easily find a replacement at any Home Depot. We have several of their tools that live in our camper and make life on the road a lot easier.
Outfitting a new RV with these tools will keep costs down (you only need a few batteries) and take up less space (you only need one charger). I have included links to Amazon to make shopping easier for you, but you can likely get these cheaper at Home Depot.
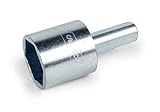
Scissor Jack Socket and Cordless Drill
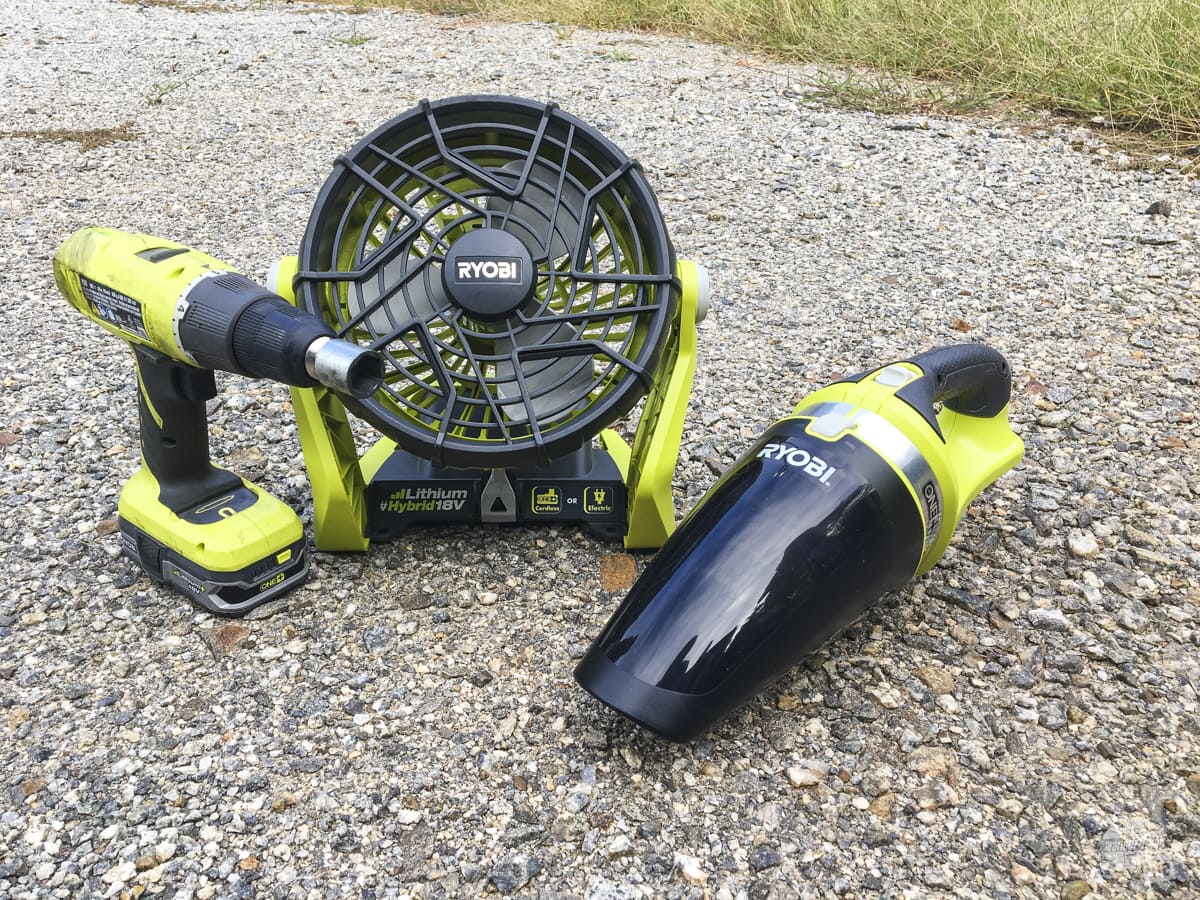
I can’t tell you how much time this scissor jack drill adapter, combined with a cordless drill, will save you. You put this in your drill, then the stabilizer jacks go up and down in seconds. We saw a poor guy in Baker, NV putting down his scissor jacks by hand in 100+ degrees.
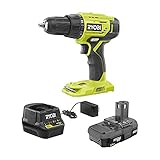
Other Ryobi One+ Gear
I got this drill, a bare-bones model I picked up at Home Depot. It lives in the camper and I rarely use it for much more than driving the scissor jacks, but I have a drill bit kit just in case I need it.
I also have a portable fan that runs off either batteries or an outlet. This is great for boondocking (camping without connections) when it is a bit warm at night. Both of these are great additions to any camper.
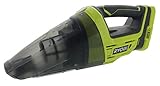
Need a hand vac? Ryobi makes those, too. We have that plus we got a handheld air compressor to be able to top off tires. Yes, it has enough juice to inflate the tires on the camper and is great for making sure they are full before a long drive. All run on the same batteries and charger, which makes it quite convenient.


Electrical Gear
Your camper relies on the electricity you put into it, so don’t skimp on the gear you use to connect your camper to the pedestal.
Power Cord
If your camper did not come with one, you will need one in the correct amperage, either 30 or 50 amps. We have a 30-amp camper, so I picked up a power extension cable. In both New Orleans and Indiana, we ran into several campgrounds where we needed a power cable extension. The pedestal was at the back and our power connection is close to the front of the camper. It’s just prudent to have an extra power cable.

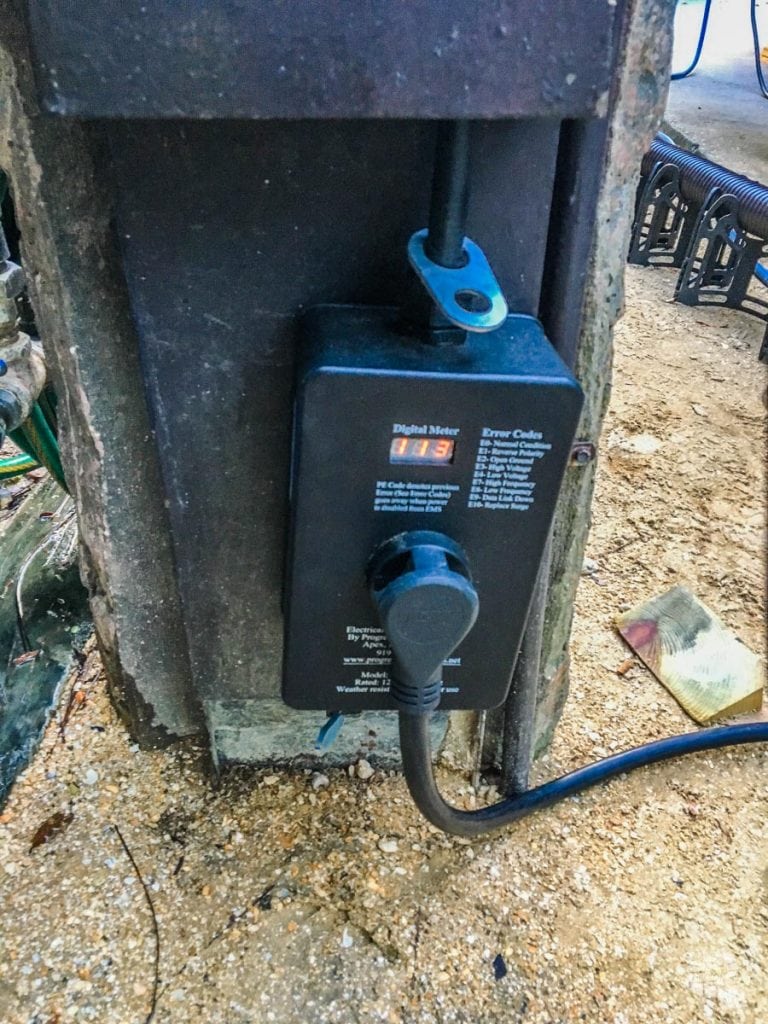
Power Management
Like the hitch, power management is a source of serious debate among RVers. There are a few different brands, each with plusses and minuses. We ended up buying the Progressive Industries model and it has been great so far. Basically, the device works like a surge protector for your camper. It analyzes the power coming from the pedestal, looking for all sorts of electrical problems.
The best part for me is the lifetime warranty. Our model actually failed on us. It was working just fine, but caught a low voltage problem at a campground. Then, a few nights later, it just stopped letting electricity through the unit. It would analyze the power and not give any error codes but no juice was going to the camper.
We called Progressive and they FedEx’ed a new unit to us to our campground in Bar Harbor. Seriously, you can’t beat that kind of service! I have linked to their most up-to-date model.

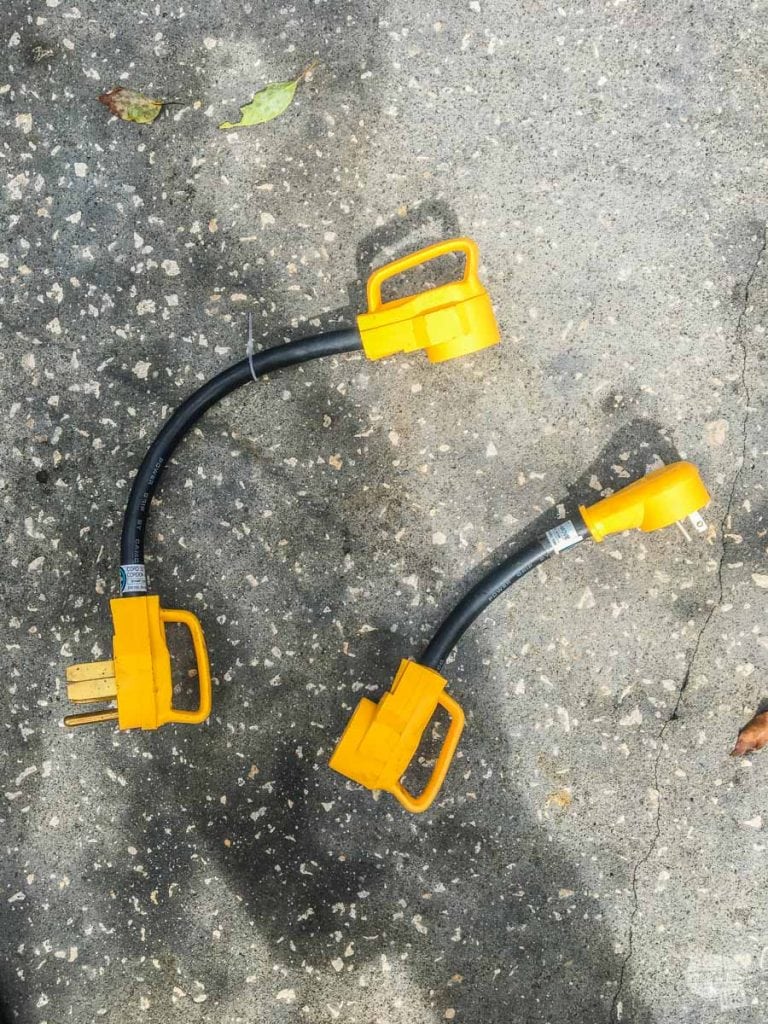
Dog Bones
A dog bone is not something for your pet. It is a plug adapter for your camper. Let’s say you are out on the road, no reservation, just going to stop at an RV park along the way. You get there and they have a spot, but only a 50 amp connection for your 30 amp trailer. What do you do then? You pull out the dog bone and plug right in!
Since I have a 30 amp camper, I have two: I have a 50 amp to 30 amp and a 15 amp to 30 amp, covering the two different plug types out there. You will need to get the dog bones that work for your camper.
One thing to bear in mind: a dog bone is just a plug adapter. It will not magically make more power come out of a lesser connection. You will not be able to function normally on a 30 amp connection if you have a 50 amp RV. Typically, that means you will not be able to run A/C, which is often the biggest power draw.


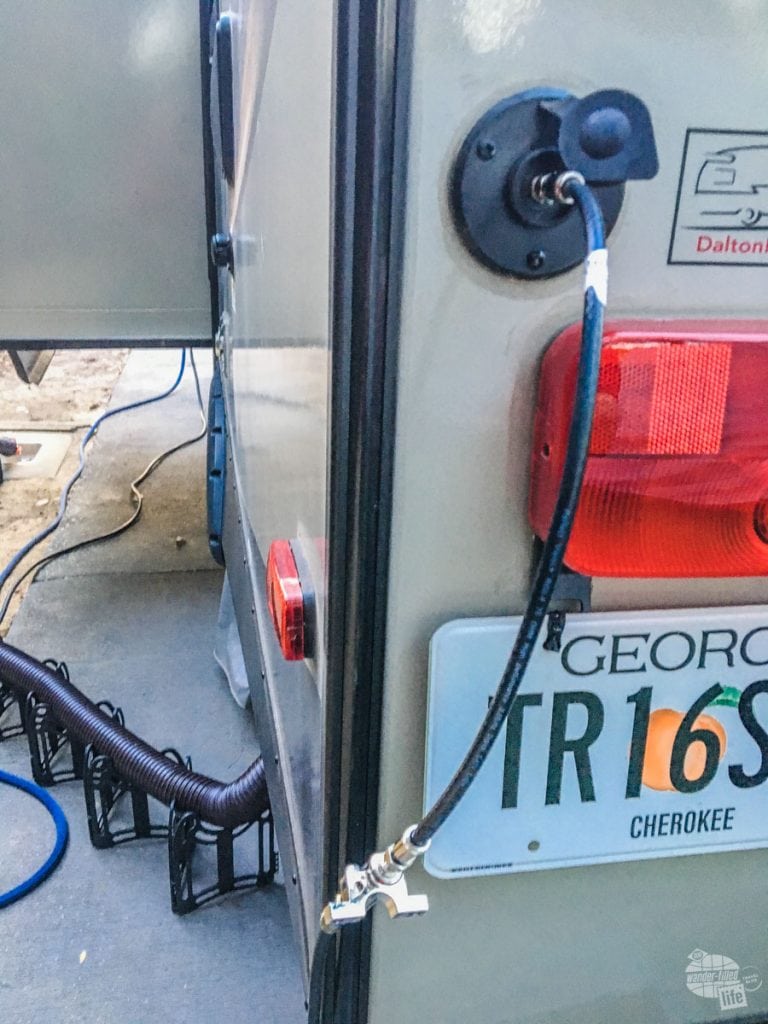
Coax Cable and Surge Protector
If your camper has a cable connection, you might as well have some coax cable to take advantage of the cable at your campsite. I suggest a 25-foot length and a one-foot cable for using an in-line surge protector.
You protected your main electrical system from getting zapped, but make sure you protect your TV, too. Connect this to the shorter coax cable on the exterior of your camper and then to the connection to the park.
No products found.
Water Connection Gear
Just like electricity, water is essential to the good operation of your camper… Keep it fresh and clean. So, let’s talk about your water connection. Your water connection is an essential part of outfitting a new RV.
Drinking Water Hose
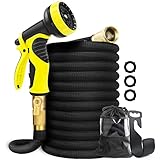
First things first, you will need a water hose. But not just any water hose. You need a food-grade water hose. These are typically white or blue, not the green garden hose. Originally, we had a standard white rubber hose for our water connection, but the collapsible hose I use for flushing the sewer hose is so convenient, that I looked for a similar hose for drinking water. Once I found one, I was hooked!
This is seriously one of the best upgrades I have gotten for the camper after our first major trip. This is so much easier to use than the hose above. Yes, it costs more but is well worth it in terms of the lack of hassle and the smaller space it takes up. GET THIS HOSE!
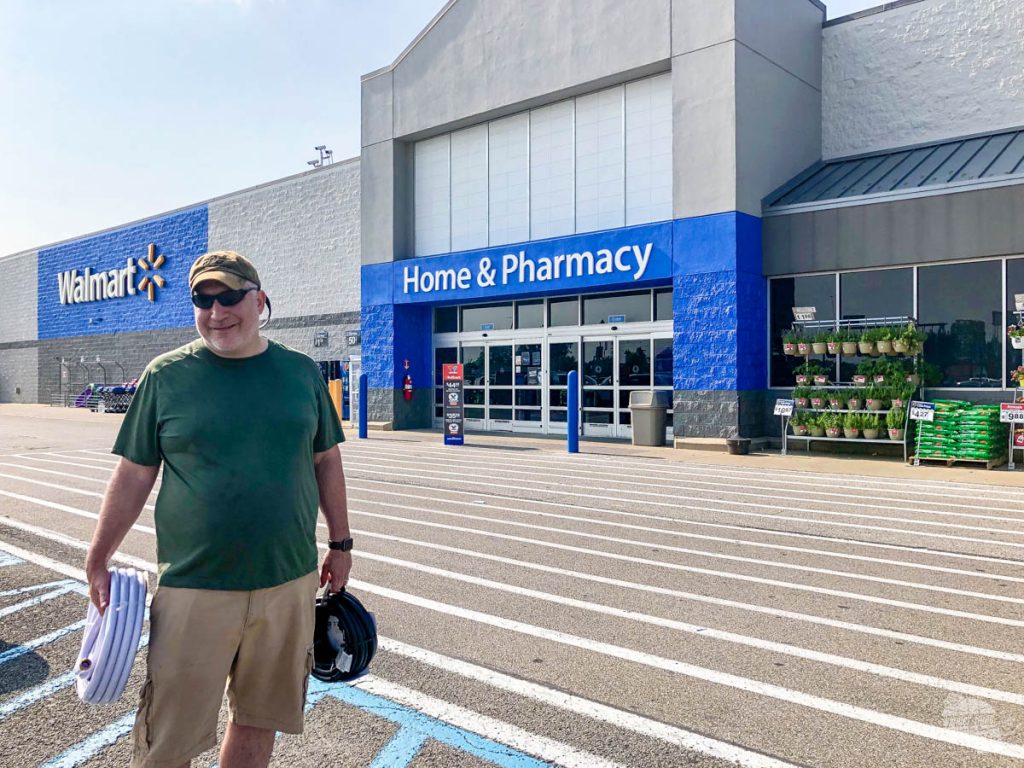
Be sure you get the 50-foot model. We ended up having to run to Walmart on our Great Lakes trip because we needed a longer hose. After three summers of camping, we thought we were good. We were wrong. We had to buy a longer rubber hose. We still have it, just in case, but we bought the 50-foot Apex hose and it is so much easier to deal with.

Pro Tip: Do not use this hose for anything other than drinking water. You do not want to contaminate your drinking water!
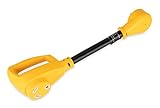
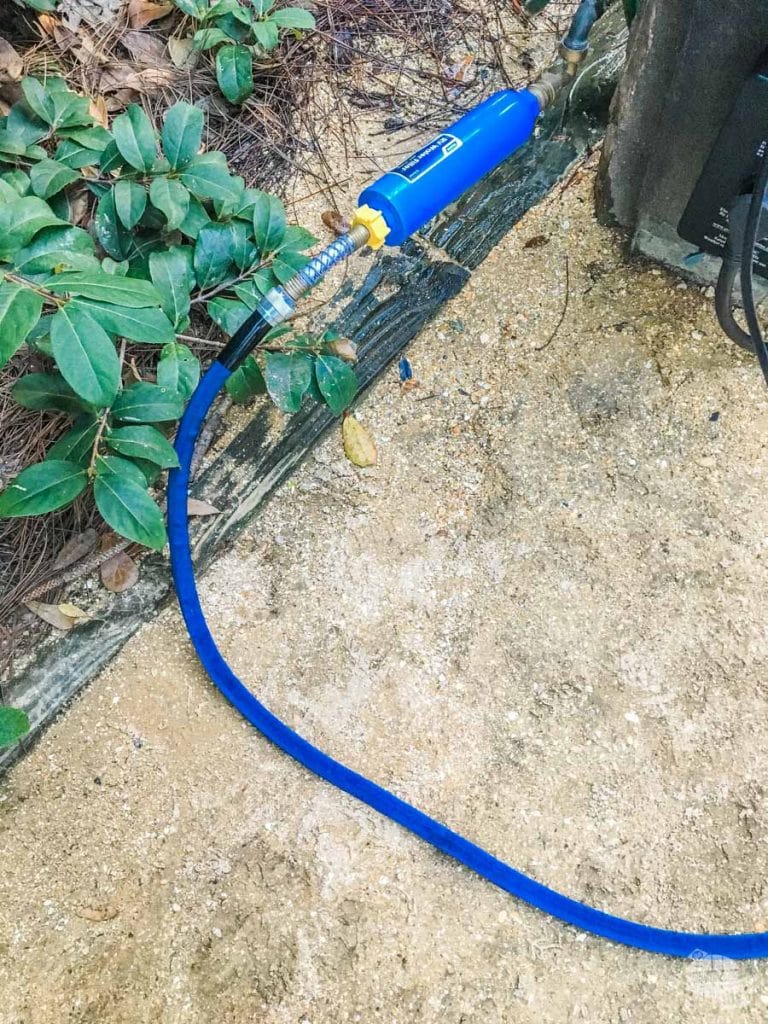
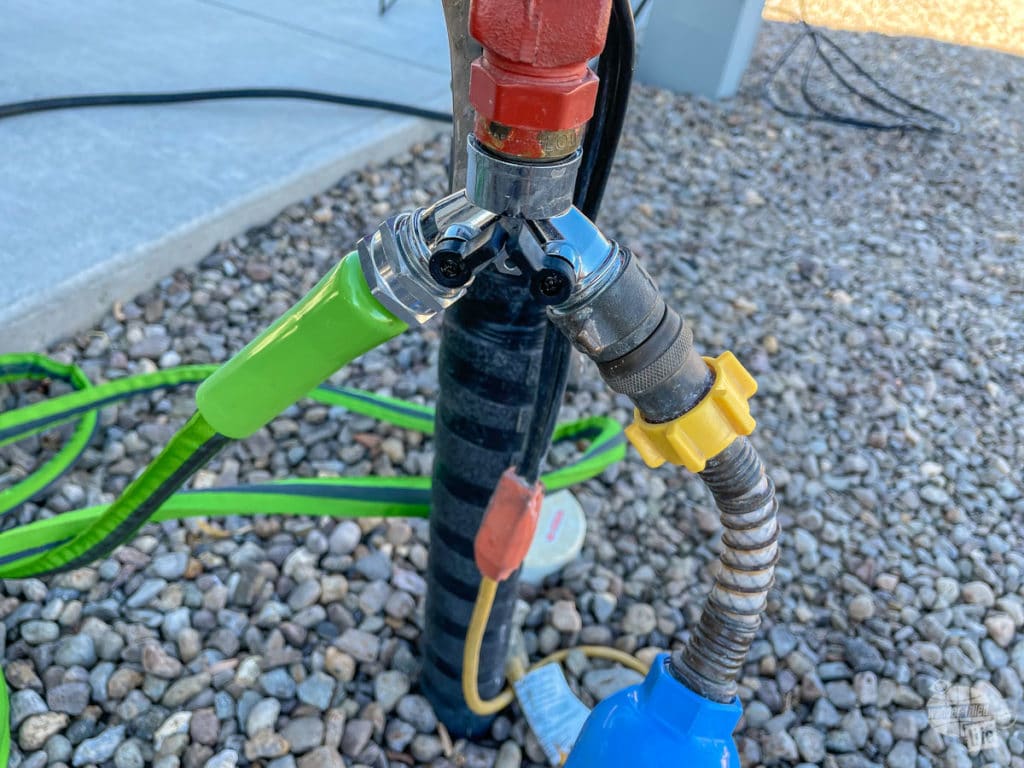
Water Pressure Regulator
A water pressure regular is a must. You don’t know what the water pressure is at the campground you are going to. It could be 120 psi. Your camper, on the other hand, only needs 40-50 psi. Using too much pressure will cause your pipes to leak!
Pro tip: connect this to the campground’s water supply, then connect the filter, then connect the hose, which will connect to your camper. Here’s why: the pressure will build up at the regulator but will be reduced on the other side. You don’t want your components (hose and filter) dealing with additional pressure. That will lead to hose failure a lot faster. See the picture above.
Water Filter
There are several different systems you can use for a water filter. Some campers have filters built into their system. This is a good, easy-to-use

Water Splitter
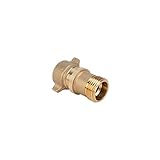
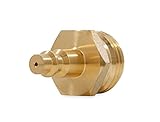
I recently added a simple connection splitter to my gear. What this allows me to do is connect to the black water tank flush valve when I am setting up the camper. I use this to add water to the bottom of the black water tank to prevent the build-up of solid matter. It’s simple and effective, letting me accomplish two things at the same time. I got mine at Walmart while on the road but here is a nice brass one on Amazon.

Sewer Gear
Just like your water connections, a good sewer connection is essential for outfitting your new RV. Unless you just don’t want to use water at all, you will need to be able to safely and sanitarily drain your gray and black water tanks.
Every camper is different and some have funky sewer connections but this gear works for me and is the most common stuff I have seen out there up to this point.
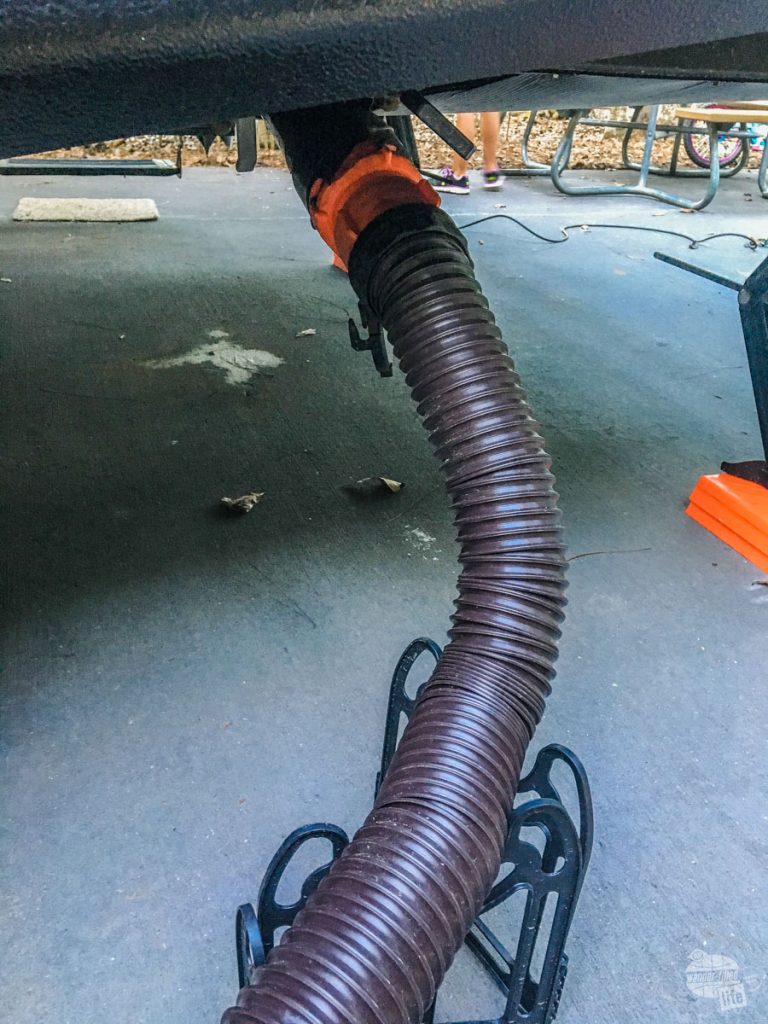
Sewer Hose Kit
The first thing you want to buy is a sewer hose kit. This kit has just about everything you need to get started. Get the 20-foot kit. It comes with a 10′ connecting hose and a 10′ extension hose. Most of the time, that is all you will need in terms of connecting to a sewer hook-up. I have linked to their new, improved model which has a clear elbow connection.

Typically, the sewer hose connection is a few inches above the ground and you want a smooth flow into it. This sidewinder “stand” will allow the hose to run smoothly over uneven ground to the sewer connection and drain easily. I recommend getting a 20-foot support.

Pro tip: Sometimes your Lynx Levelers will come in real handy when doing a sewer connection, like when we stayed at Fishing Bridge RV Campground in Yellowstone National Park. Sometimes, you have to improvise, adapt and overcome!
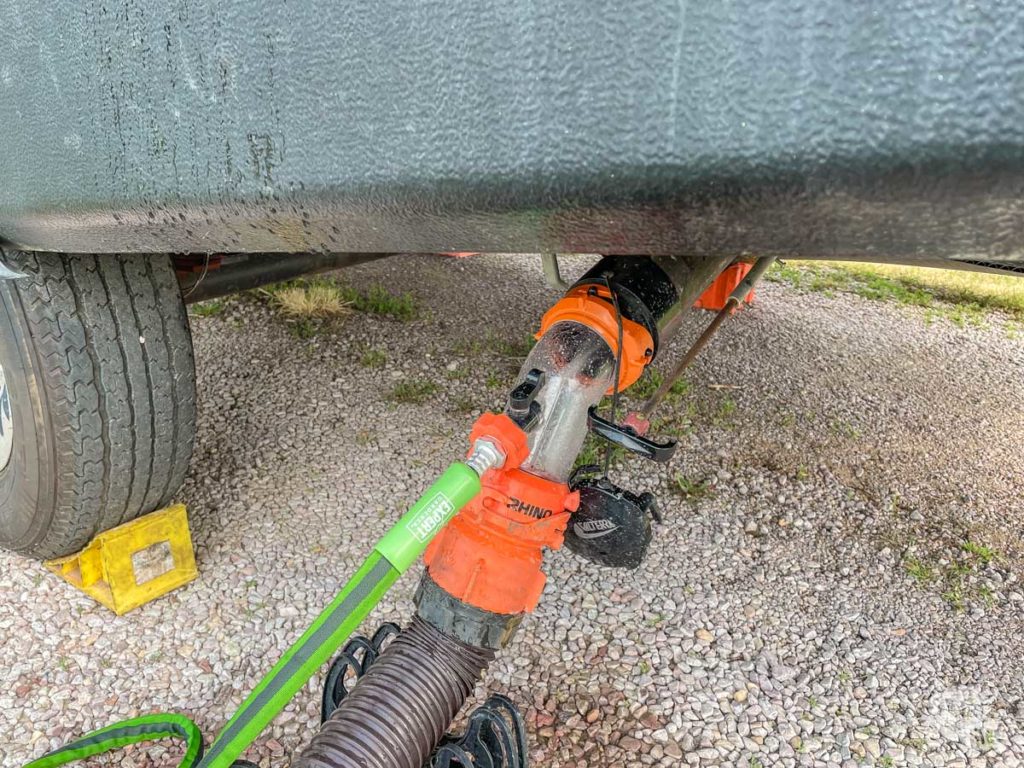
Sewer Tank Rinser
So, after staying at several campgrounds without other bathrooms to deposit solid matter in, I noticed some build-up in my black water tank. We solved part of this problem by partially filling our tank. But that didn’t solve the problem of the existing build-up. So, I picked up this attachment and blasted out my black water tank from the drain and it worked exceptionally well. I was able to flush out a lot of solid matter easily and it was easy to tell when the tank was clean.

Sewer Rinse Adapter and Secondary Hose
I can’t begin to tell you how much I love this adapter, which connects to our sewer hose, and makes it easy to wash the hose out after draining the tanks. Most of the time, it is attached to my secondary hose (see below).
So, you drained your black tank and your gray tank and now you are ready to rinse that sewer hose out because who wants to travel with funk in your hose? Just attach this to a generic hose, turn on the water, uncouple your sewer hose from the camper and couple it to this adapter. Turn on the valve on the adapter and voila! No mess. No fuss.
You can get a cheap rubber garden hose to use when you clean the sewer hose, flush the tank or spray down the camper, but this is so much better and takes up a lot less room.

Winterization Gear
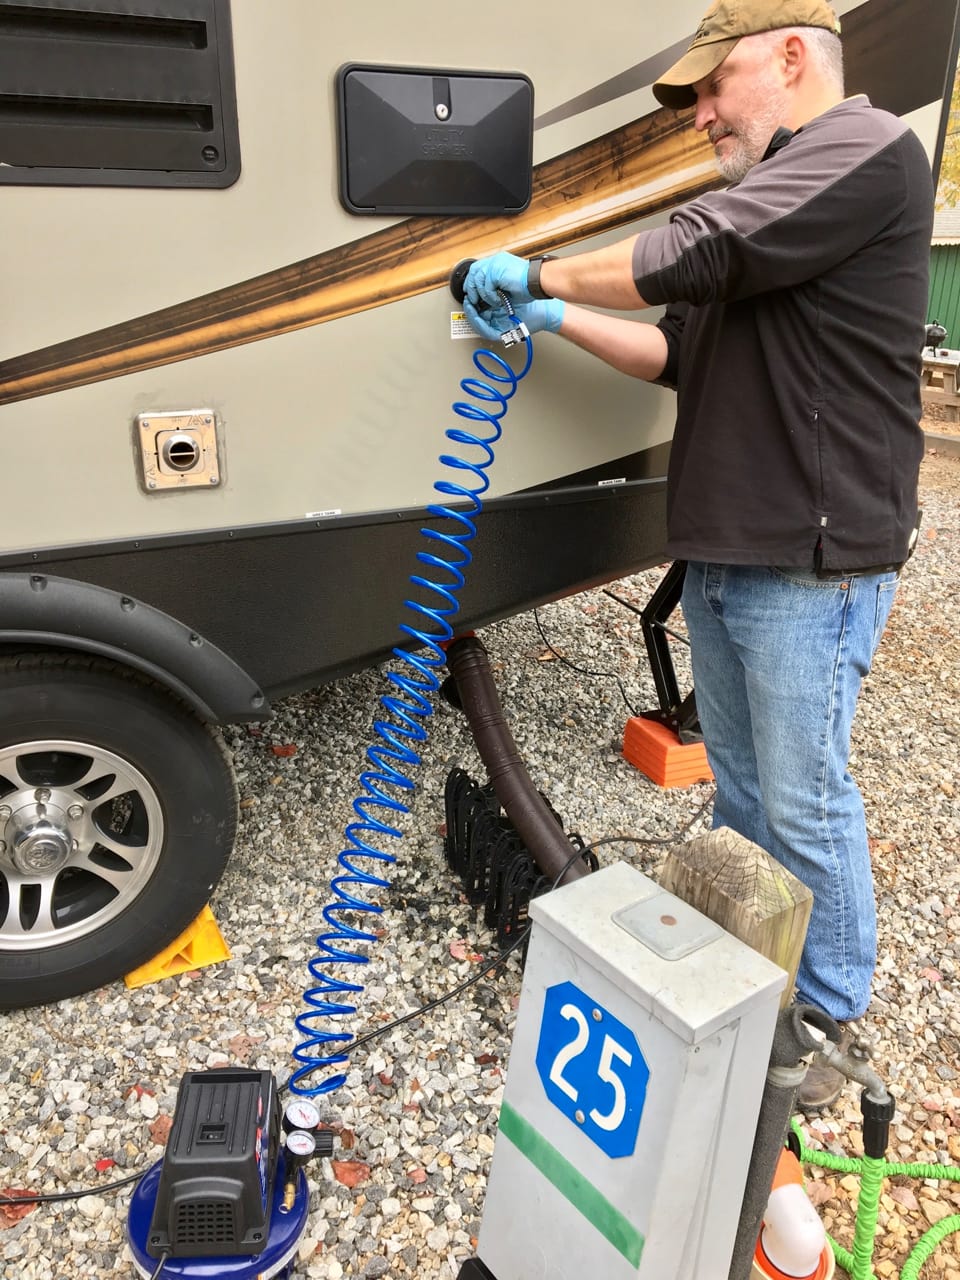
While you, likely, won’t need it right away, you will need some equipment to winterize your camper. You will want to either drain all of the water lines and holding tanks OR fill them with RV antifreeze. There are a couple of different methods to accomplish this task. We use an air compressor to blow out all of the water lines and then drain our tanks. We put a little antifreeze in each tank and in all of the sinks.
Read up on how we winterize our camper.
Air Compressor
I got a small, pancake-style air compressor that would store easily in the camper. The idea is, using an adapter, you blow all of the liquid out of the lines. This worked like a charm. While it is loud, this is not something you should need to use all the time. Unfortunately, the Craftsman air compressor I have linked is a lot more expensive than the one I bought (sadly, Amazon no longer sells it). But, this one has all the accessories you need for winterizing your camper in one package.

If you have an air compressor already, Camco makes a great adapter to blow out the lines with.
Miscellaneous Gear for Outfitting a New RV
This is the gear I keep in my pass-through storage that just makes RV life easier. This section of “Outfitting a New RV” includes essentials that make your quality of life better.
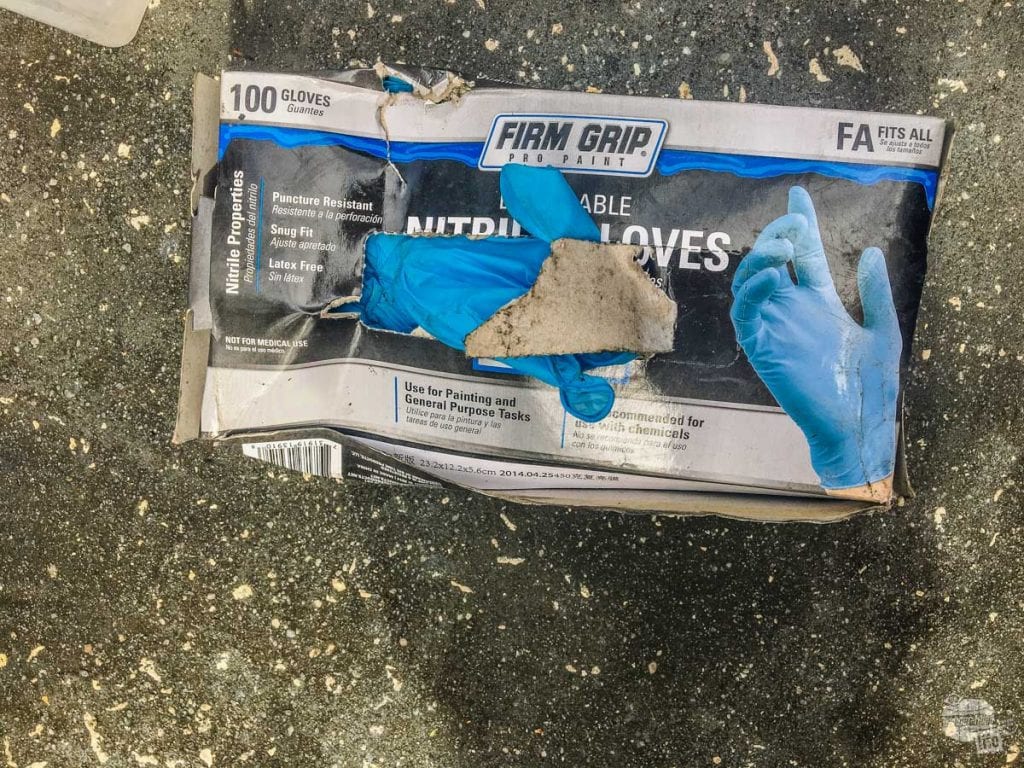
Rubber gloves
I keep a box of disposable gloves in the pass-through for two reasons: dealing with the sewer system and dealing with the ball lube. Once I am done with both, take them off and throw them away. These are easy to acquire at Walmart or Home Depot if you run out on the road.
I tried the Camco ones which stick onto the door of the pass-through. I was not impressed with their durability in dealing with some of the more difficult jobs around the camper. Plus, they were just slippery in terms of grip.

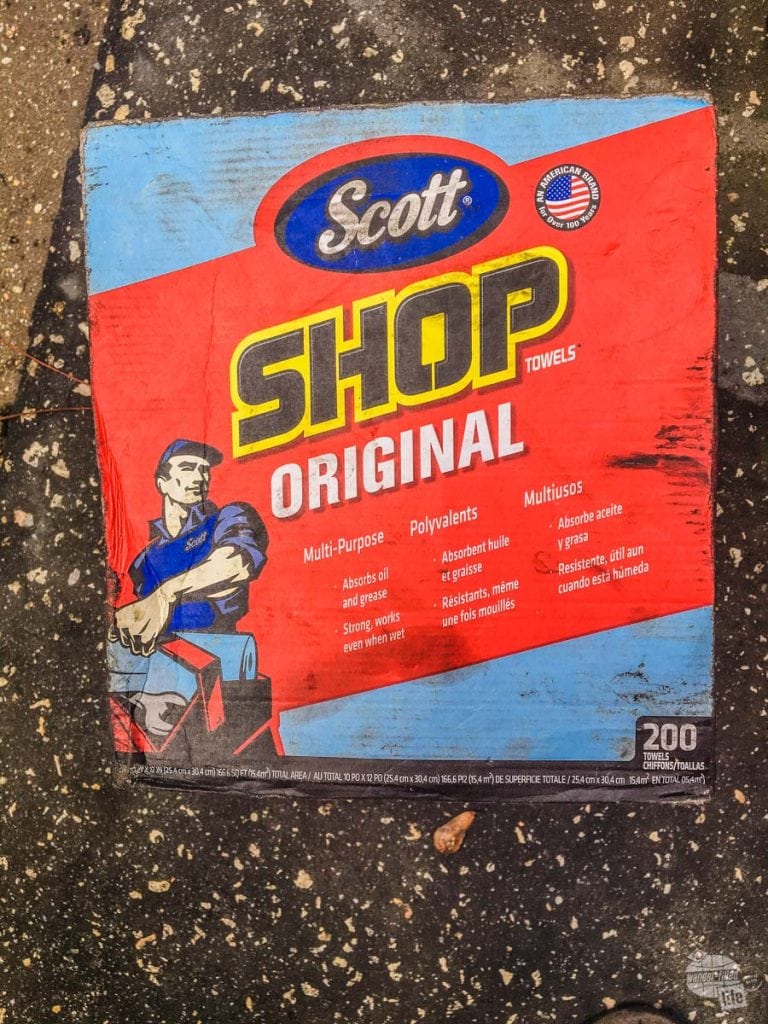
Shop Towel
I keep a box of these towels in the pass-through and they are great. The box itself is a little

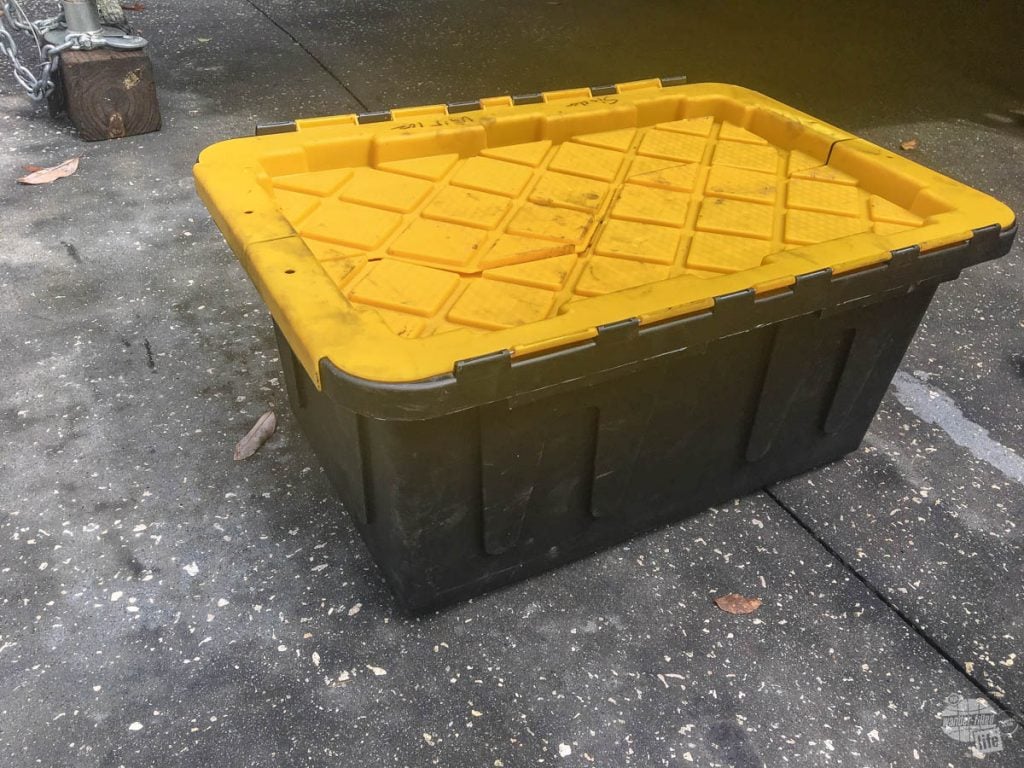
Storage Bins
I have not used these bins in particular, but I have several just like them. They are perfect for storing stuff like our tools, leveling gear, etc. I love the built-in lids! It means you never misplace a lid or leave it behind!
I keep bins for leveling gear, electrical stuff, drinking water hoses
Every pass-through is different. Measure yours and get the bins that fit your compartments.

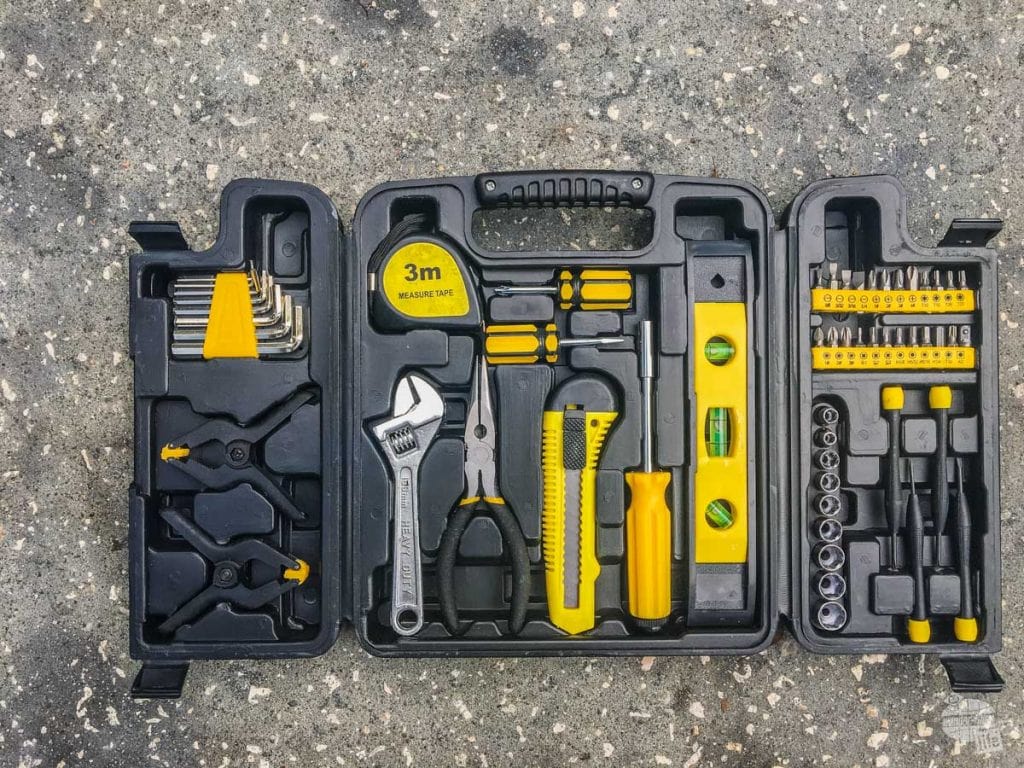
Basic Tool Kit
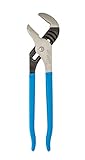
Every RV needs a basic tool kit. Like the bins, I don’t own the linked kit, but it is a pretty close approximation of what I do own. You don’t need to keep a ton of tools in your camper but something like this will help you solve most problems you run into. The only tools I feel are missing from the kit are a pair of vice grips and a large adjustable pair of pliers. Vice grips are surprisingly handy and I have had to use them to separate my pressure regulator from one that the campground put on the spigot. The large adjustable pliers are perfect for removing a stuck sewer cap.


Gear for Relaxing Outside
Once you have your camper set up, it is time to set up the fun stuff. Here are a few recommendations for things to have with you to make the best use of the space outside your camper!
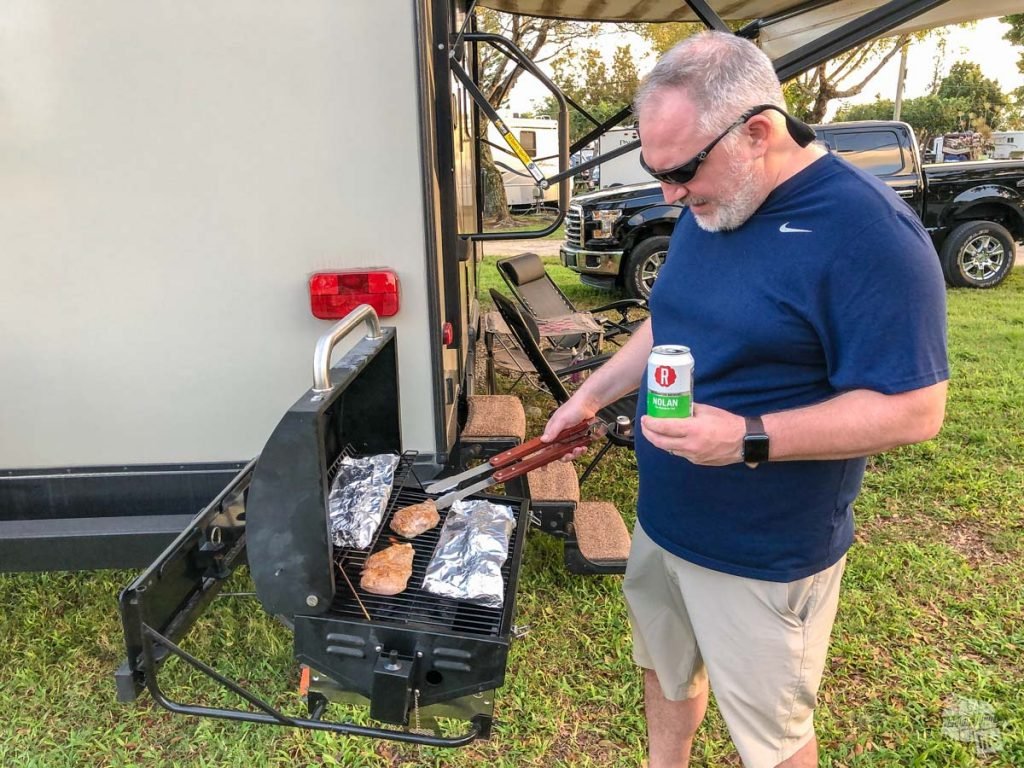
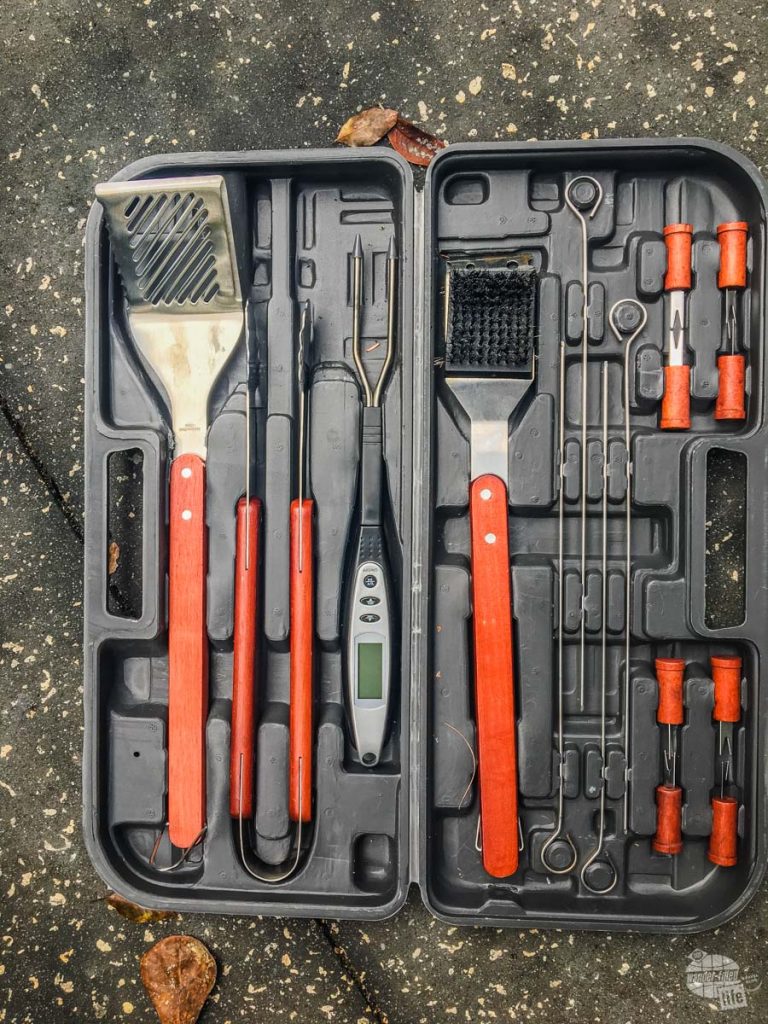
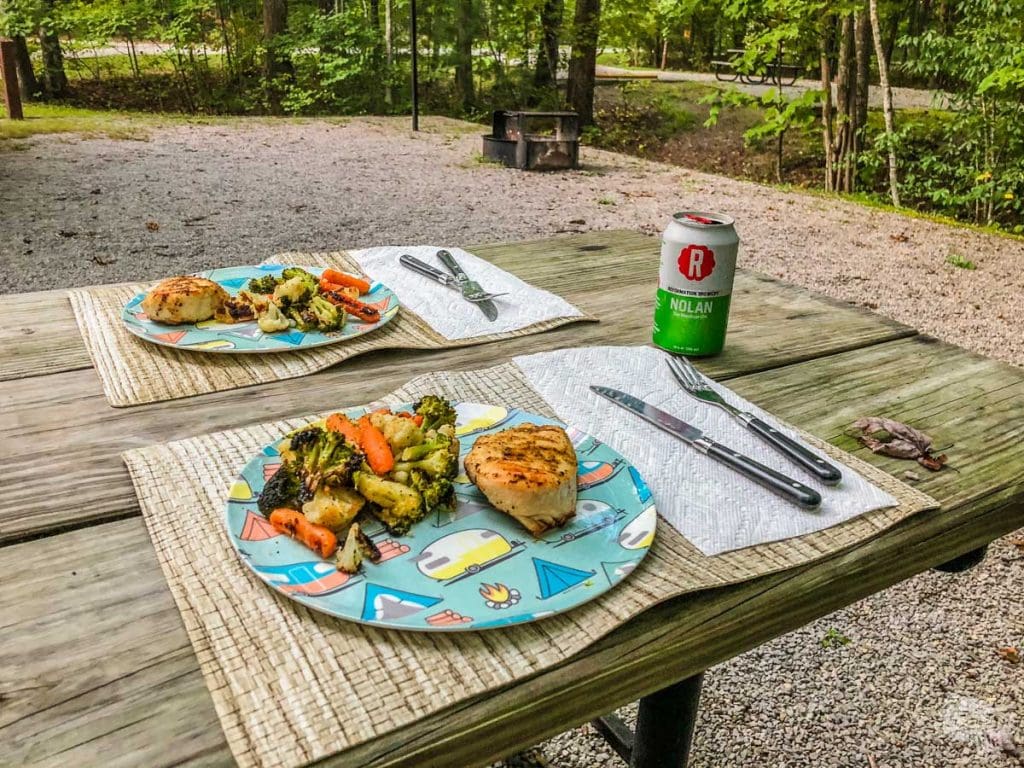
Grill and Grill Tools
My camper has one built-in, but there are plenty of good grills out there for campers. Back when we were tent camping, we had a great tabletop grill, made by Coleman similar to this one. They make some other really good portable grills that use the very easy-to-find 16.4 oz propane bottles.
The grill tools I have are suited for a grill without a nonstick coating (the one above has one… use plastic tools on it). This grill tool set is very similar to the one I have that lives in my camper.

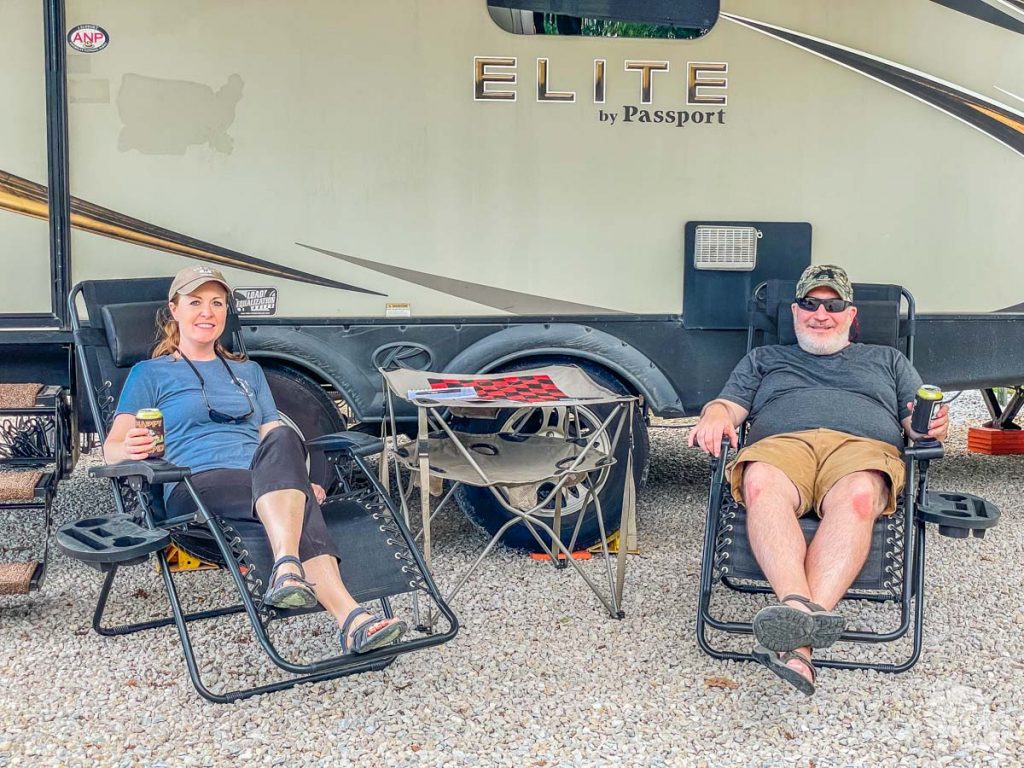
Chairs, Outdoor Tables and Hammocks
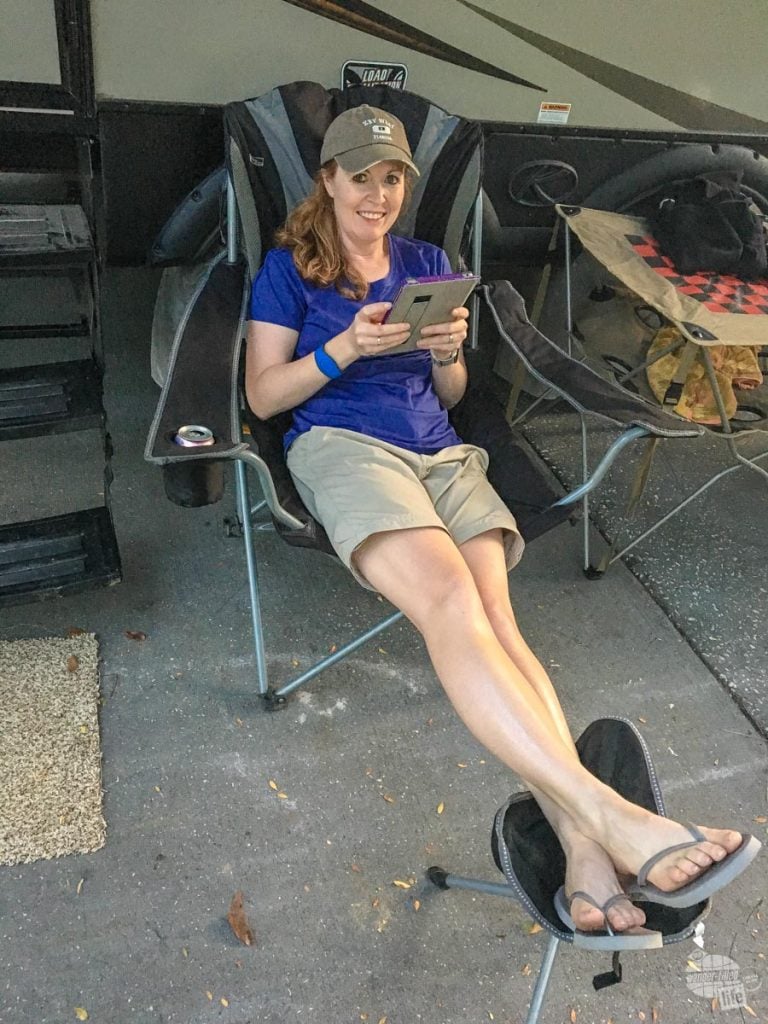
You are gonna want some camp chairs so you can enjoy the outdoors (otherwise, why are you in a camper to begin with?). If you have a large motor home or fifth-wheel, there are some amazing folding chairs that will fit in your storage areas with no problems. For us, in our travel trailer, we need chairs that fold down smaller but still provide serious comfort.
We had these chairs from Picnic Time for years and love them. They are very comfortable and, combined with these footrests are just about perfect.

Zero Gravity Chairs
A few years ago, we upgraded to Caravan Sports Infinity Zero Gravity Chairs. These things are great! They are super comfy, the backs are mesh so they breathe really well. They recline far further than I need and you can easily lock them in position. Plus they are cheap!
They do have a couple of downsides: It can be a bit difficult to get them started reclining and they do not fold down nearly as small as our old chairs. Indeed, I have some difficulty storing them in the pass-through with the grill in there as well. Still, for the money, they are great!
If you decide to get them, get a couple of these little side tables. They work like a champ!


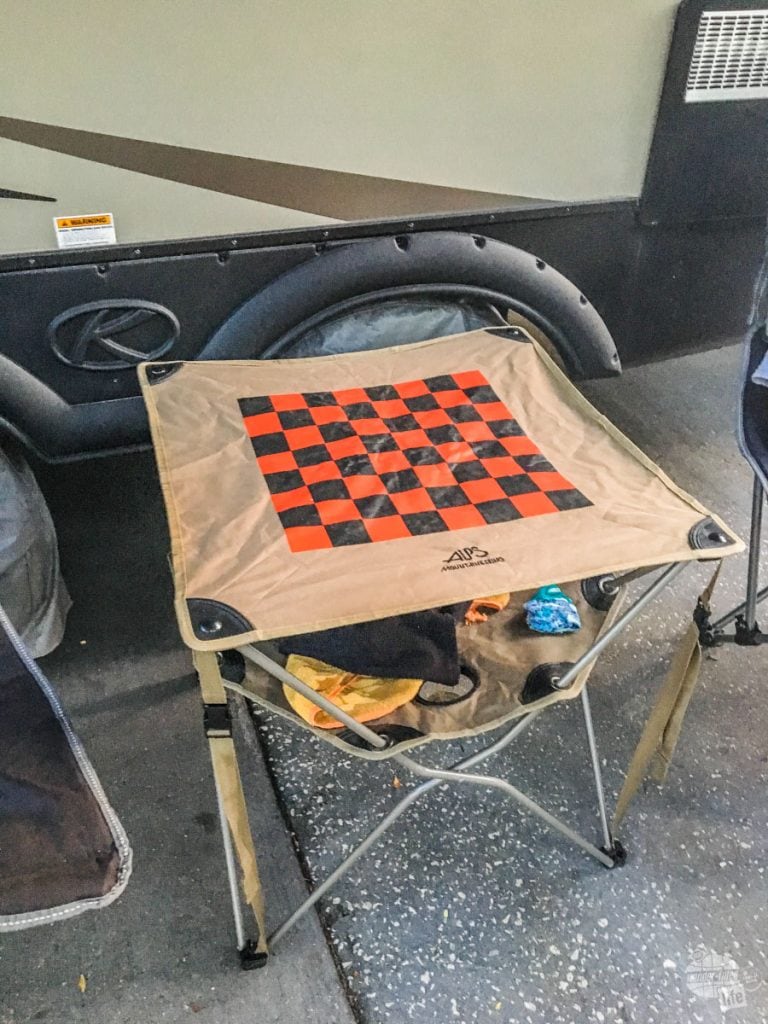
Table
Having a table to set things on is always nice. This table from ALPS Mountaineering has been a great addition to our campsite since we tent-camped. I got the model with the checkerboard on it, in case Bonnie and I ever decide to play checkers or chess on it.

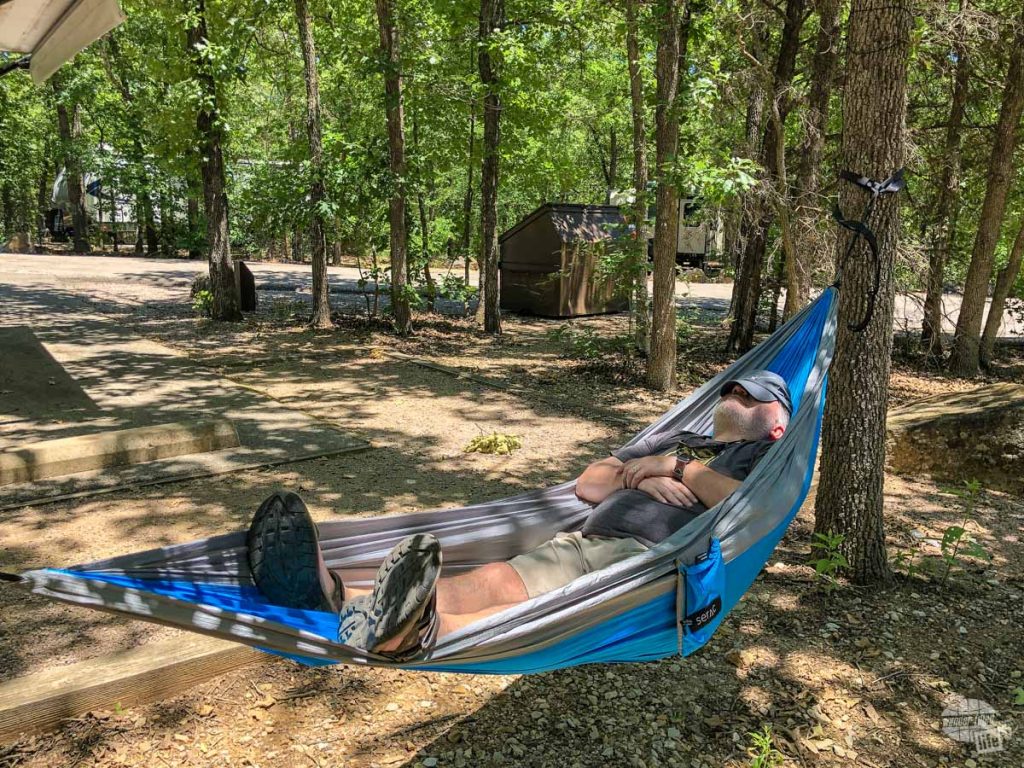
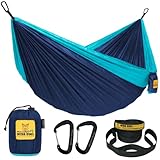
Hammocks
One of the recent additions to our gear is a couple of hammocks for relaxing at a campground. We like nylon hammocks because they pack down to almost nothing. We got this hammock in a Cairn Box and it has since been a constant companion with us at campsites. It sets up easily in just a few minutes.
Boondocking Gear
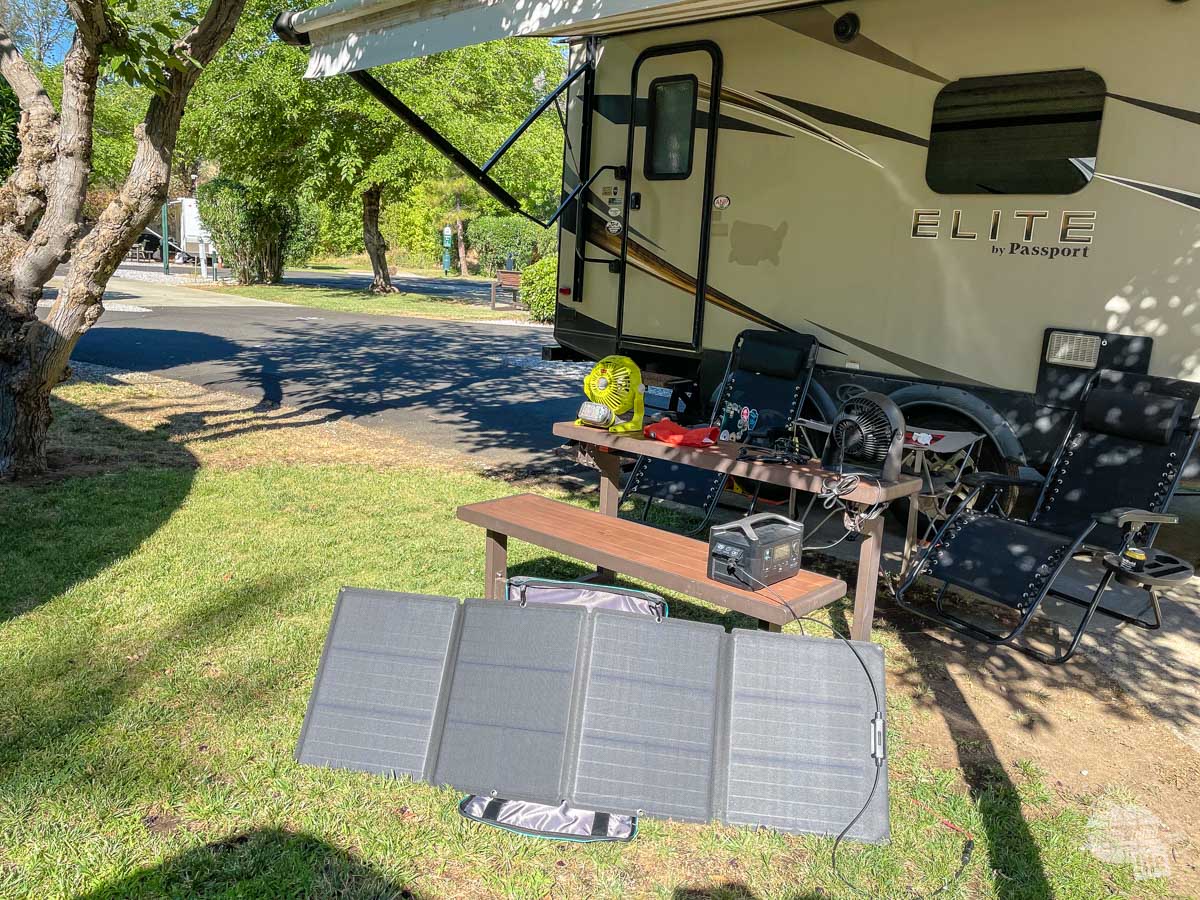
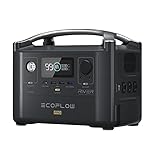
Solar Generator
The folks from EcoFlow sent us one of their River solar generators to test out and I have to say we love it. A solar generator is essentially a large battery pack with a solar charge regulator built in. It is great for boondocking and dry camping. We were able to keep all of our devices charged (phones, tablets, laptops and cameras) and Bonnie was able to have a hot cup of coffee every morning while we dry camped outside Crater Lake National Park.
We were so impressed with the device, we bought an EcoFlow 110W solar panel to charge it. As long as you have a clear shot at the sun, it charges the generator quickly. This system is great any time you are without power, camping or not. We also bought a battery add-on, which doubles the capacity of this excellent piece of gear, making it comparable to the EcoFlow River Pro.
EcoFlow continues to add new solar products, including some generators that will power an RV or a house!


Rechargeable Lantern
If you are boondocking, having a good source of light that is not draining power from your RV’s batteries is pretty essential.
We recently got a rechargeable lantern similar to this one which has both a USB port and solar panels to charge it. This lantern is bright enough for most indoor tasks and makes for an excellent basic outdoor lamp.

A Few Other Pieces of Gear for Outfitting the Outside of Your RV
A few other items I suggest, but I don’t have a specific gear recommendation for:
• A large outdoor mat or rug to set up under your awning for muddy and gravel sites.
• Some sort of mosquito repellant… I have yet to find one I am really happy with.
Outfitting the Inside of Your New RV
Now, it’s time to work on the inside of the camper. A lot of this gear is personal preference, just like furnishing a home. That said, I am going to cover the basics of what we have purchased for our camper to make long road trips with it work.
Refrigerator
The fridge is one of the most important components of making RV travel work. Not only does it keep your leftovers for the next night, it keeps those tasty adult beverages frosty, which is very important after a stressful setup in a tough back-in site.
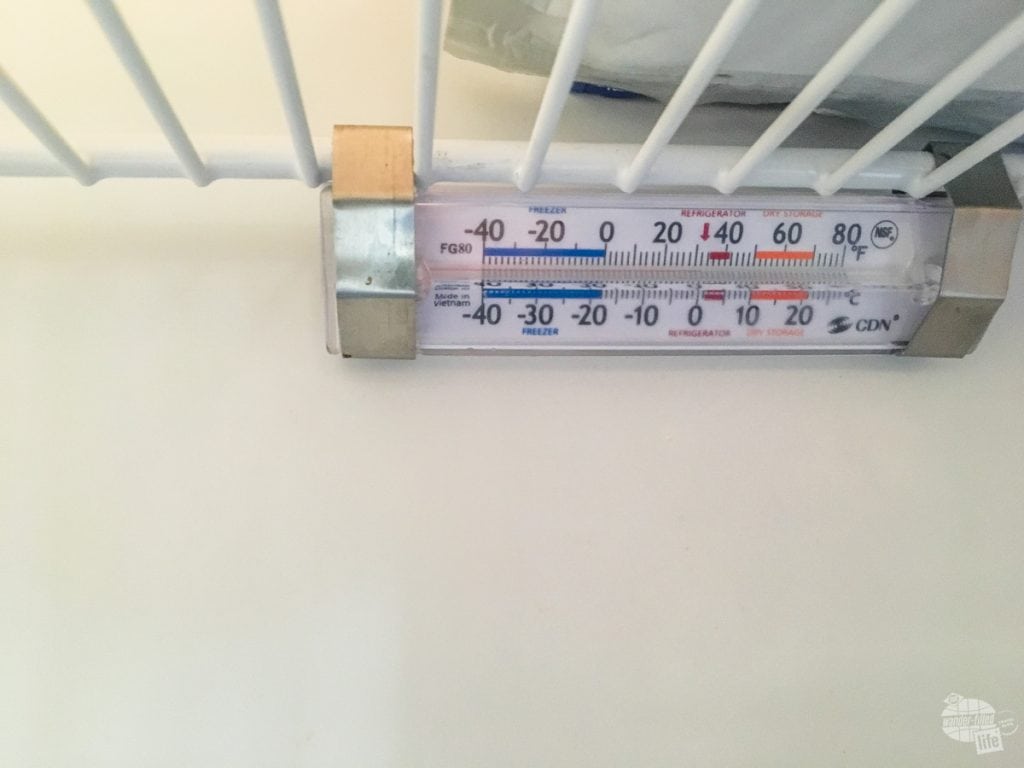

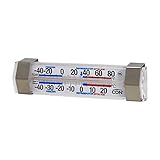
Fridge Thermometer
A fridge thermometer takes the guesswork out of whether your fridge is working properly or not. We originally bought an electronic one with a large display but ended up with an old-school thermometer. Sometimes, old-school stuff just works better.
Fridge Cold Packs
One of the best purchases we made was two sets of Cooler Shock packs. These packs go in your freezer for 48 hours to charge and will provide very cold ice packs for your fridge.
Here’s how we use them: We freeze them going into a trip. We toss all but one pack in the fridge to keep everything cold as we drive. The other pack goes in the freezer to cool it down. Once we get to our location, we fire up the fridge and move some of the packs into the freezer to refreeze. As the fridge starts to keep cold on its own, we transfer the remaining packs to the freezer to recharge.
The Cooler Shock packs work so well that we do not use propane at all to run the fridge while driving. I know a lot of RVers out there run the propane fridge while driving/towing. We don’t. I would rather spend a little money on these freezer packs, which work great than risk a propane fire… or spend the money on propane for that matter.

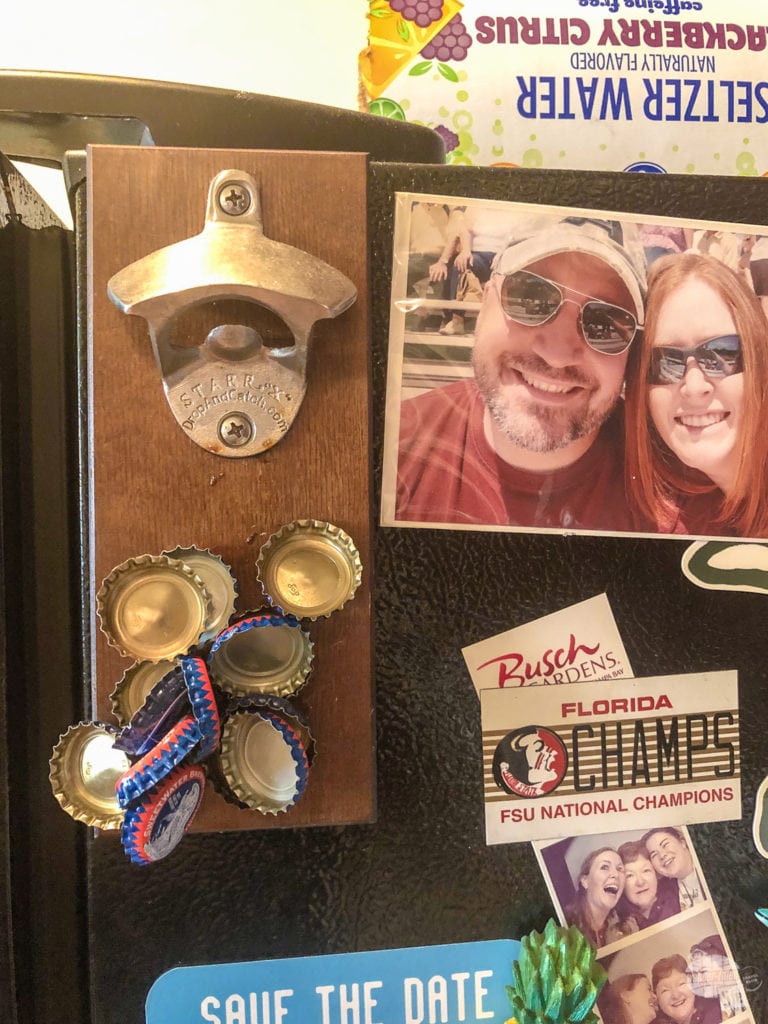
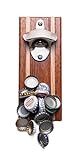
Magnetic Bottle Opener
You are gonna want to get a bottle opener for those aforementioned refreshing adult beverages. We ended up getting one from a souvenir shop in Bar Harbor, but this one is what we have at home and it works like a champ!
Ice Cube Tray
When we first hit the road with the camper, we didn’t get any ice cube trays for the fridge. We didn’t want to deal with the mess of water everywhere if the fridge stopped working (power loss, etc.) So, we tried both plastic and metal “ice cubes.” We even tried whiskey stones. None of them worked as well as we wanted.
So, for the summer of 2022, Bonnie got this nifty ice cube tray and storage system. It allows you to store a decent amount of ice and if it melts, the box contains it. It worked like a charm.
Bonnie also got some molds for large blocks of ice, perfect for whiskey on the rocks. The molds have a lid, making it good for travel as well.


Outfitting Your Kitchen
One of the first things you are going to want to do is outfit your kitchen with a permanent set of gear. The reason for this is simple: your time is worth more than the cost of an extra set of pots, pans, kitchen tools, etc. You don’t want to have to pack and unpack your kitchen every time you take the camper out on a trip.
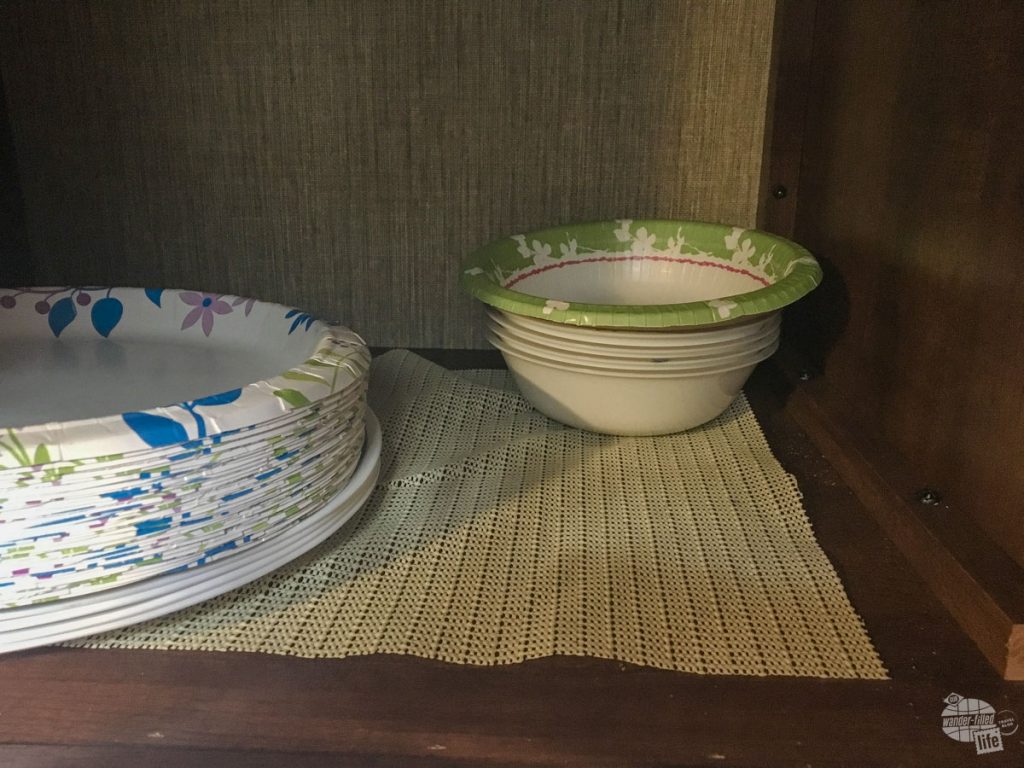
Plates
The great folks from Zak Designs sent us some camper-themed plates and bowls, plus tumblers. We have used them a few times and are really impressed. We love how sturdy the plates are plus how easy to clean. The only downside is they are not microwave-safe. And, sadly, they no longer carry the camping-themed plates.
That said, we have other things we can put in the microwave and these are just too cool not to take with us. In addition to something that is microwave-safe, be sure to get something that is shatter-resistant, such as these plates by Corelle.
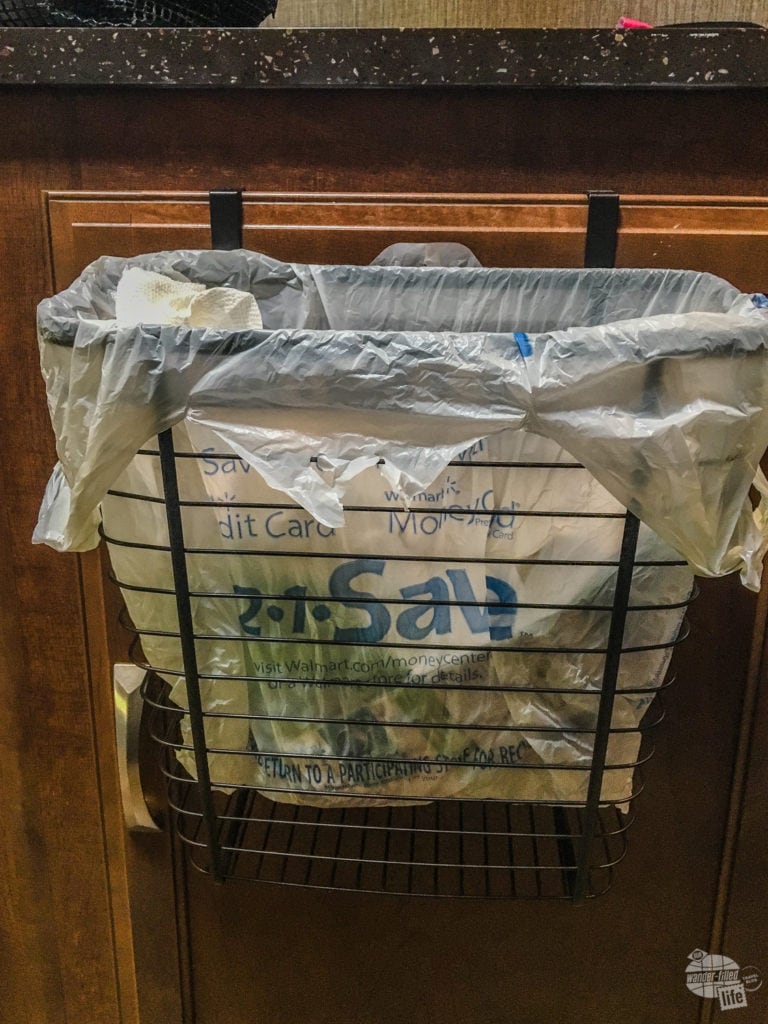
Waste Basket
This waste basket hangs over the edge of one of the cabinet doors, which keeps it off the floor (floor space is valuable). The other advantage is supermarket plastic shopping bags fit it perfectly. We found in New England there were several campgrounds with mandatory recycling programs, so you may want to consider purchasing a second wastebasket to use for recycling.

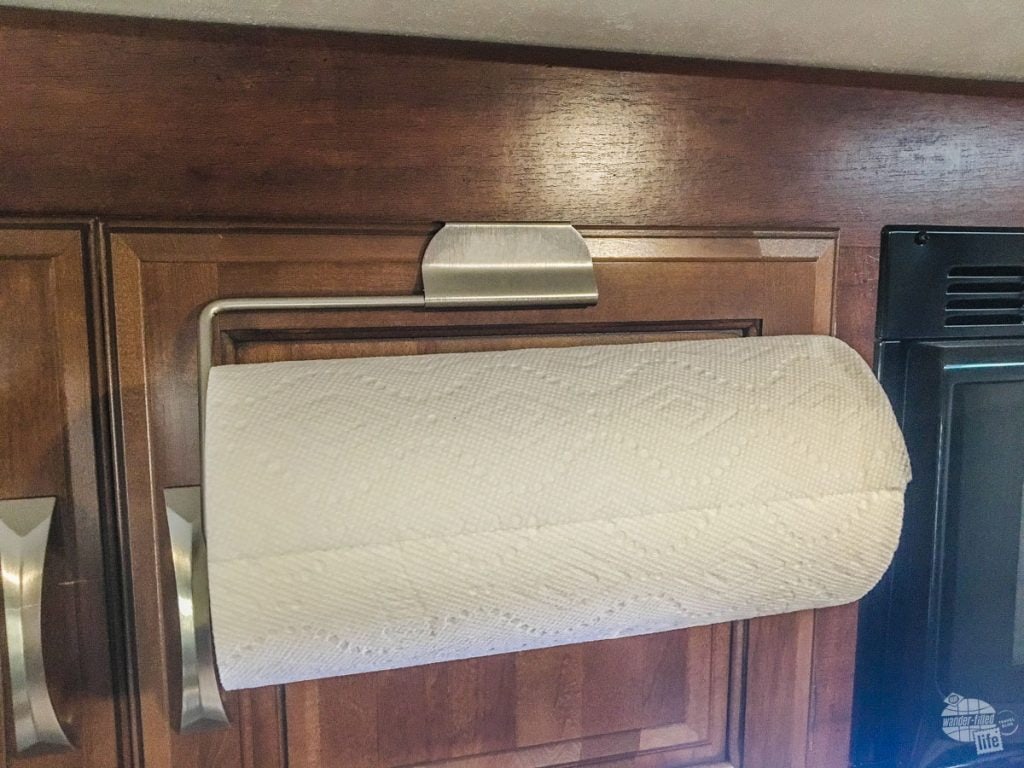
Paper Towel Holder
Like the wastebasket, this holder hangs on the top of the

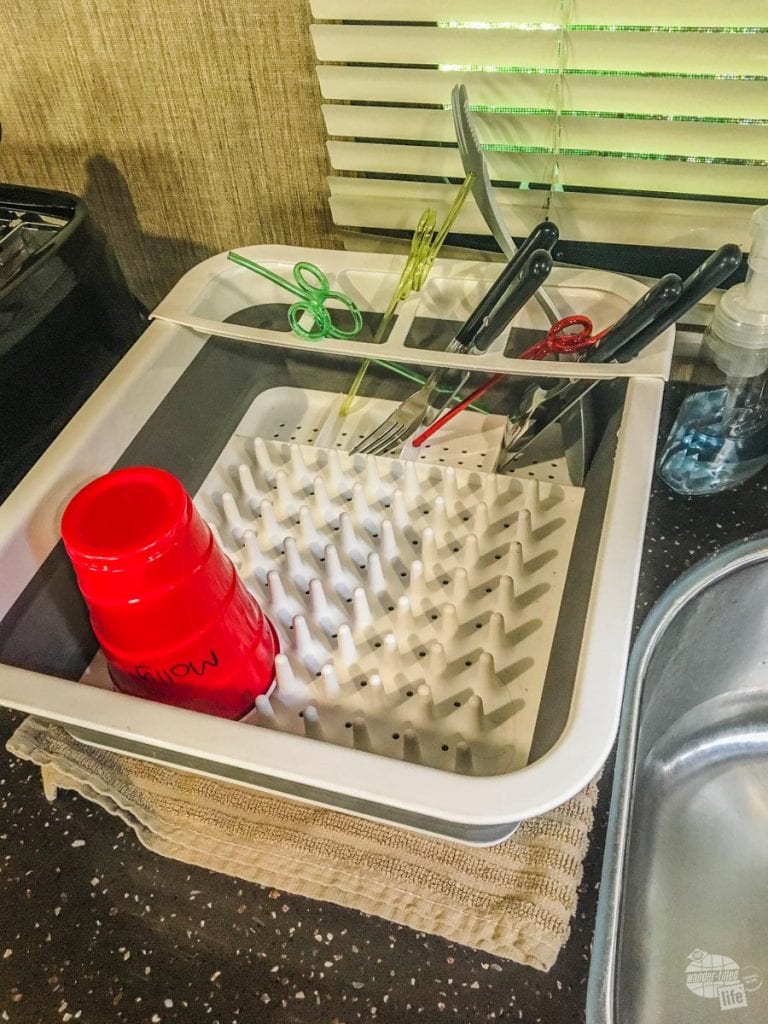
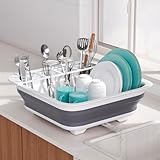
Dish-Drying Rack/Drainer
I think the one thing Bonnie hates more than doing laundry is drying dishes, so she bought a dish-drying rack/drainer. It collapses for easy storage and works fairly well.
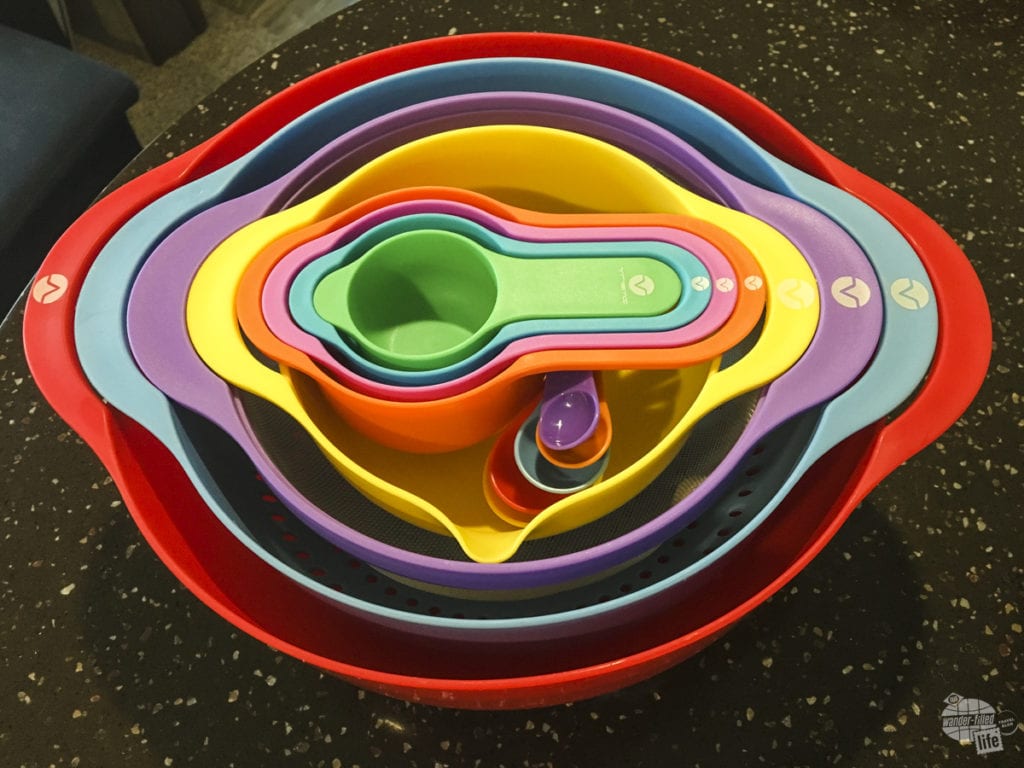
Nesting Mixing Bowls, Measuring Cups and Spoons
Bonnie loves these nesting mixing bowls and measuring cups because they take up so little room. They are perfect for the limited amount of space in our kitchen area.

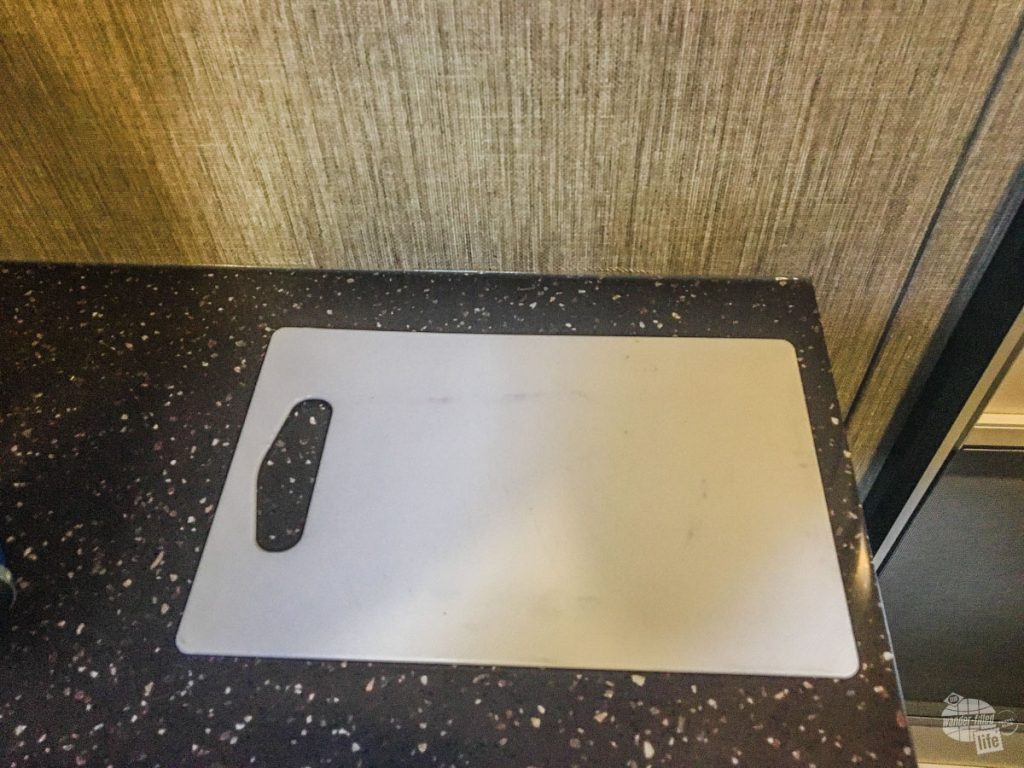
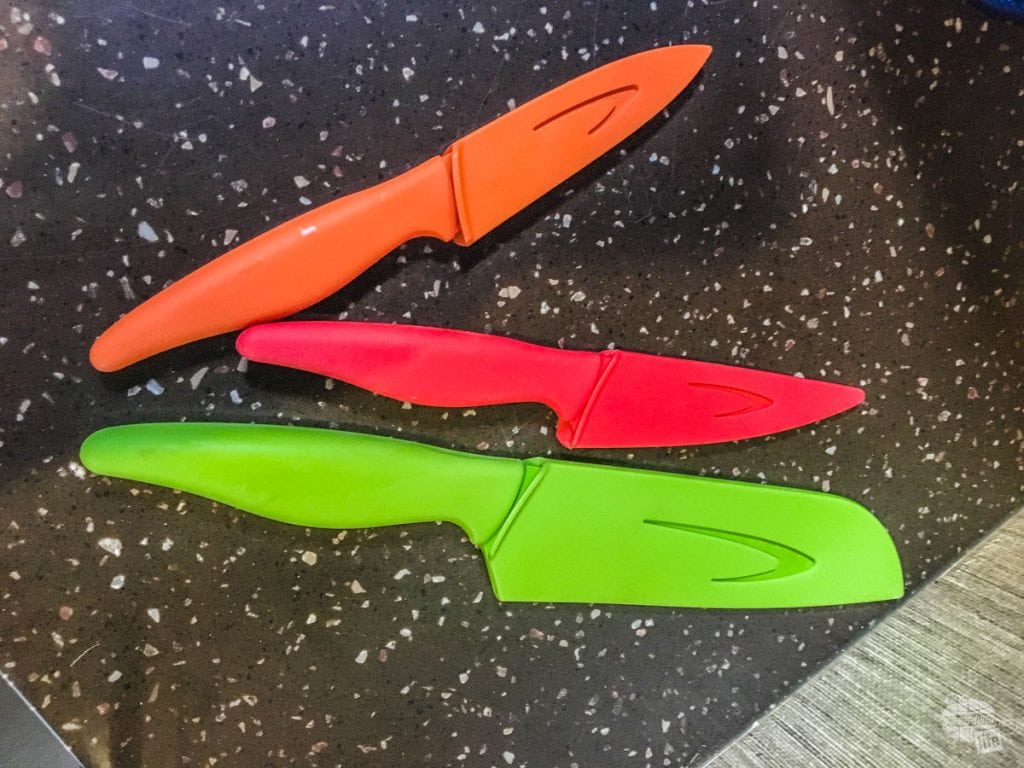
Small Cutting Board and Knife Set
Our current cutting board is a bit small, so we will probably eventually upgrade to this one. Get a cutting board that you like, in whatever size you think you will need and can store easily.
This knife set is similar to a set that we have had for several years. Our camper doesn’t really have space for a knife block and I hate having knives in a drawer unless they are covered. There are bigger and there may be better sets out there, but a set of three has worked well for us so far.

Shelf Liner
To keep things from sliding around, line the shelves with your plates, etc. with this liner.

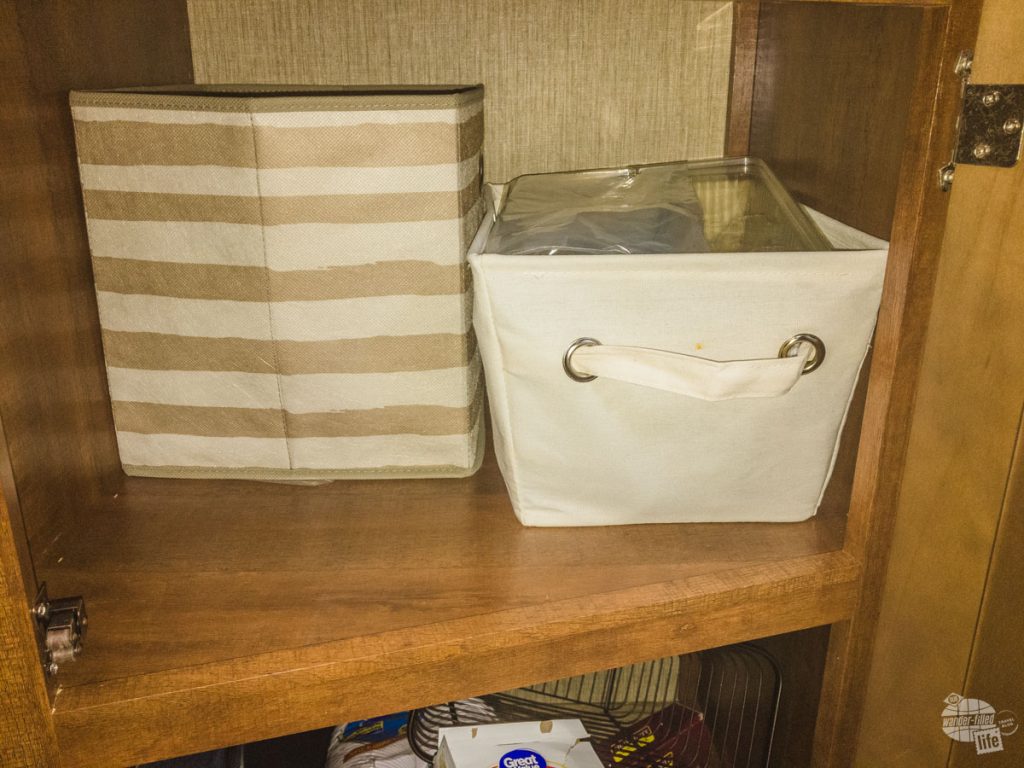
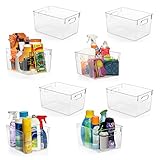
Kitchen Bins
Bonnie uses bins like these in various sizes, both plastic and cloth to hold spices and dry foods, as well as other kitchen essentials, in the cabinets. It keeps them from sliding all over the place and makes the food easy to get out.

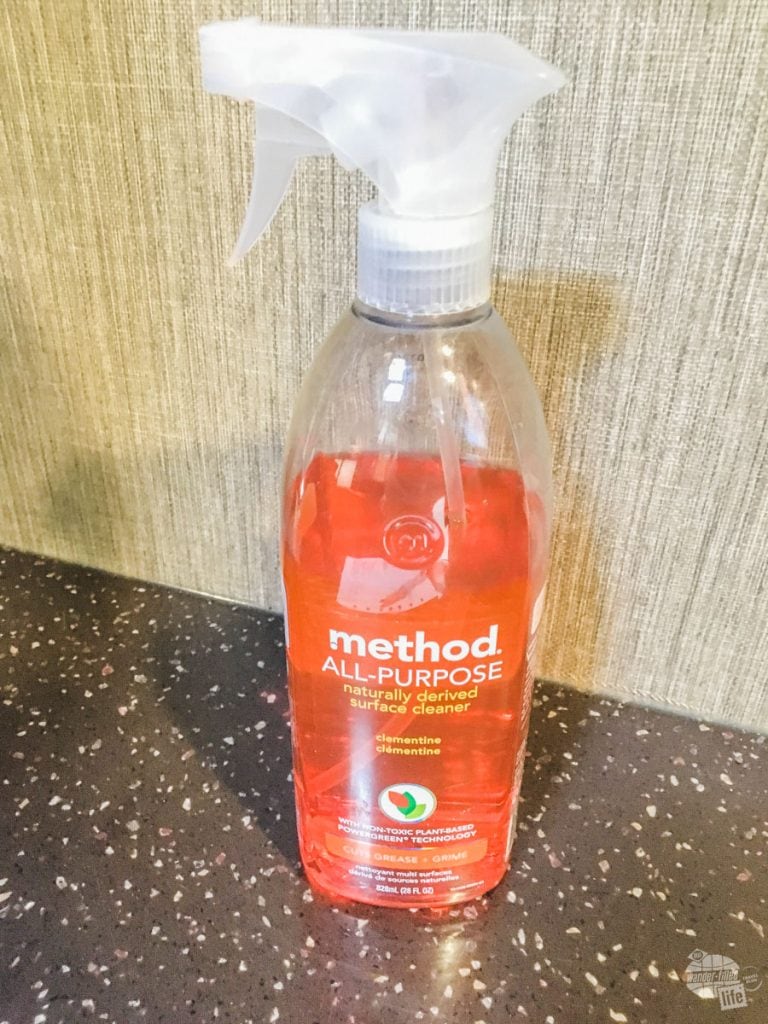
Cleaning Supplies
Make sure whatever you get is RV-safe. The materials used in RV construction are not the same as in normal house construction. We use Method cleaners and they work pretty well.
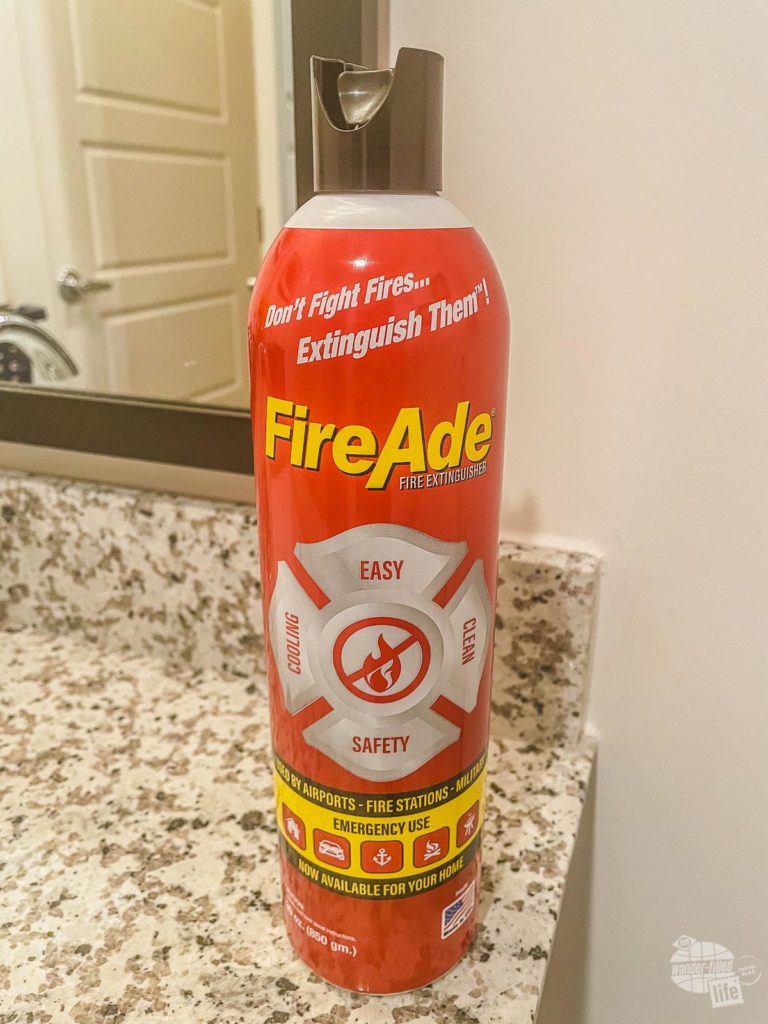
Fire Extinguisher
Every camper comes with a fire extinguisher but, to be honest, you probably need at least one more to store by the bed. Having an extra fire extinguisher where you sleep can make all the difference in getting out of a burning RV or not.
Jim Rudolph, the president of Safety First, sent us this FireAde extinguisher and we are quite impressed with its bonafides. It puts out fires quickly, washes clean with just water and will not expire. This has a permanent home in our camper by the bed. As someone who has already lived through one house fire, I am a firm believer that you can never be too careful.

Some Other Items You Will Need to Outfit Your RV Kitchen
•Basic kitchen utensil set
•Flatware and drawer organizer
•Pots and pans
Outfitting Your RV Bathroom
There are a couple of things you need to understand about RV bathrooms: 1) By nature, they are almost always cramped and 2) you need special stuff to make the toilet/black water tank work well.
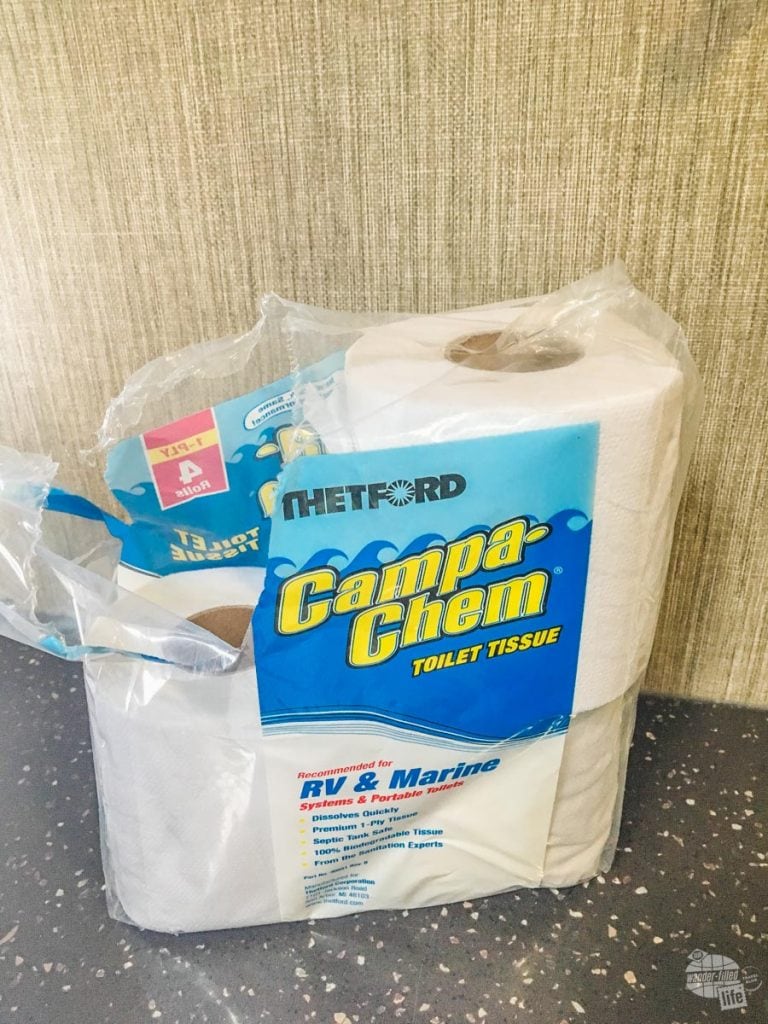
RV Toilet Paper
I would not use normal toilet paper in your camper. It will not break down and will become a problem in your black water tank. This is the toilet paper we use. You can often find this at Walmart (most of the time near the automotive section but sometimes near the camping section), so if you run out on the road, you should be able to find it. Also, a lot of campgrounds carry it in their camp stores, but sometimes those camp stores are pretty pricey.

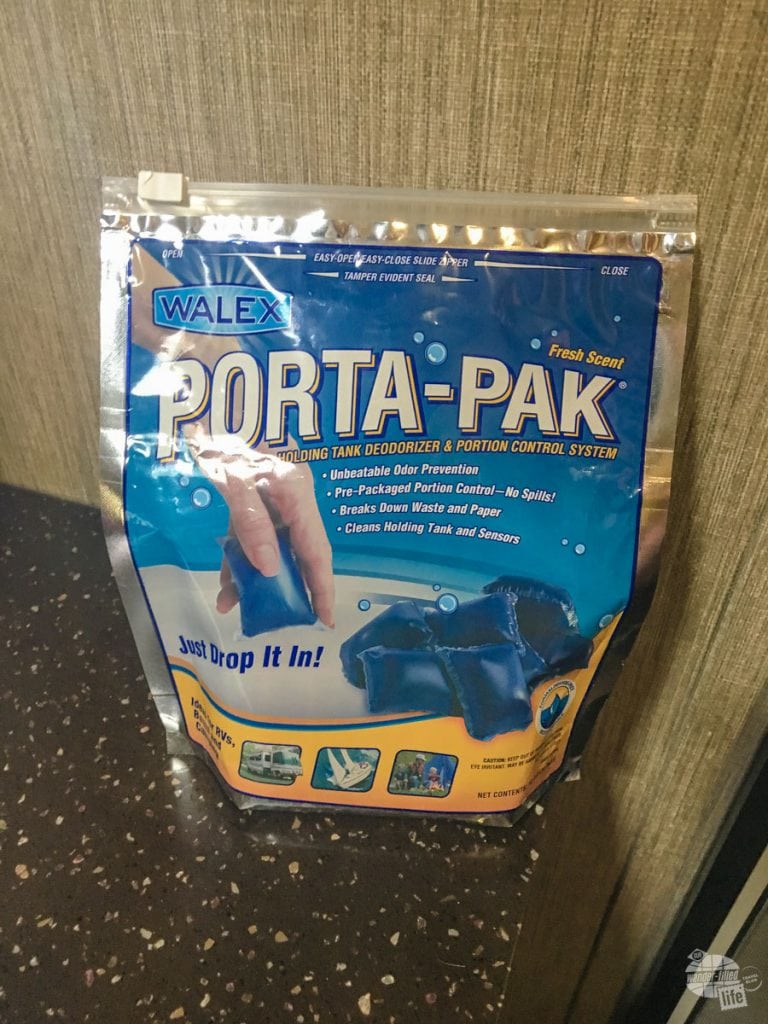
Toilet Deodorizer
Use these tabs, along with a lot of water, to prevent odor from coming up from your black water tank.

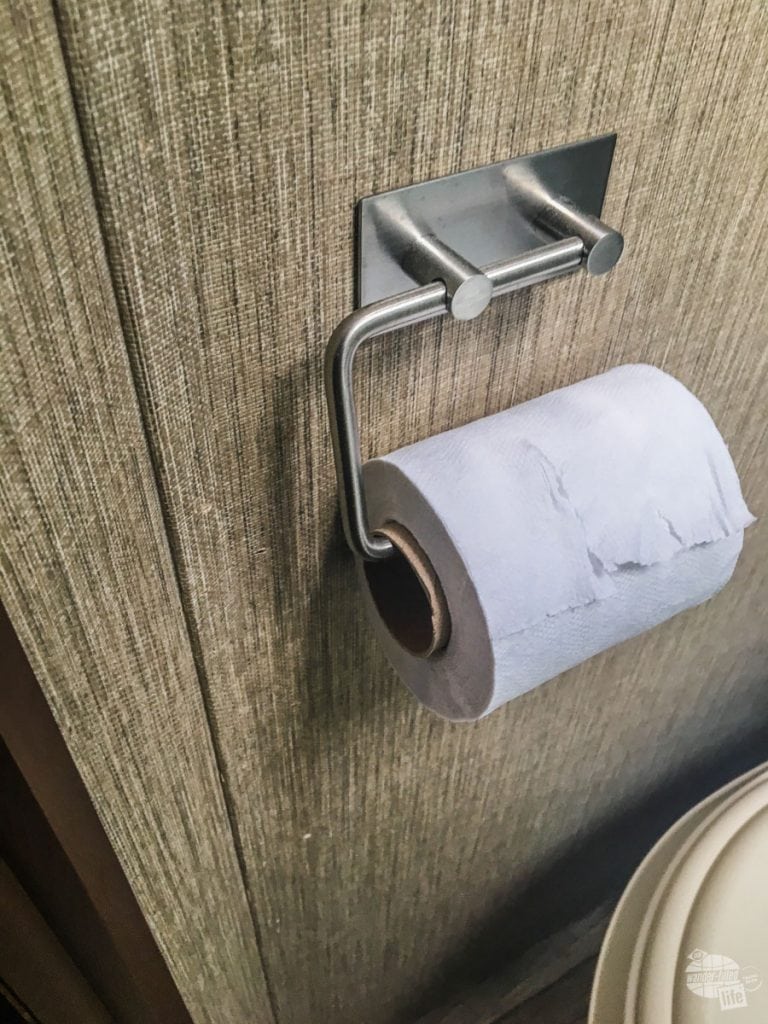
Toilet Paper Roll Holder
Our camper did not have a toilet paper roll holder by the toilet, so we bought this one and it works just fine.

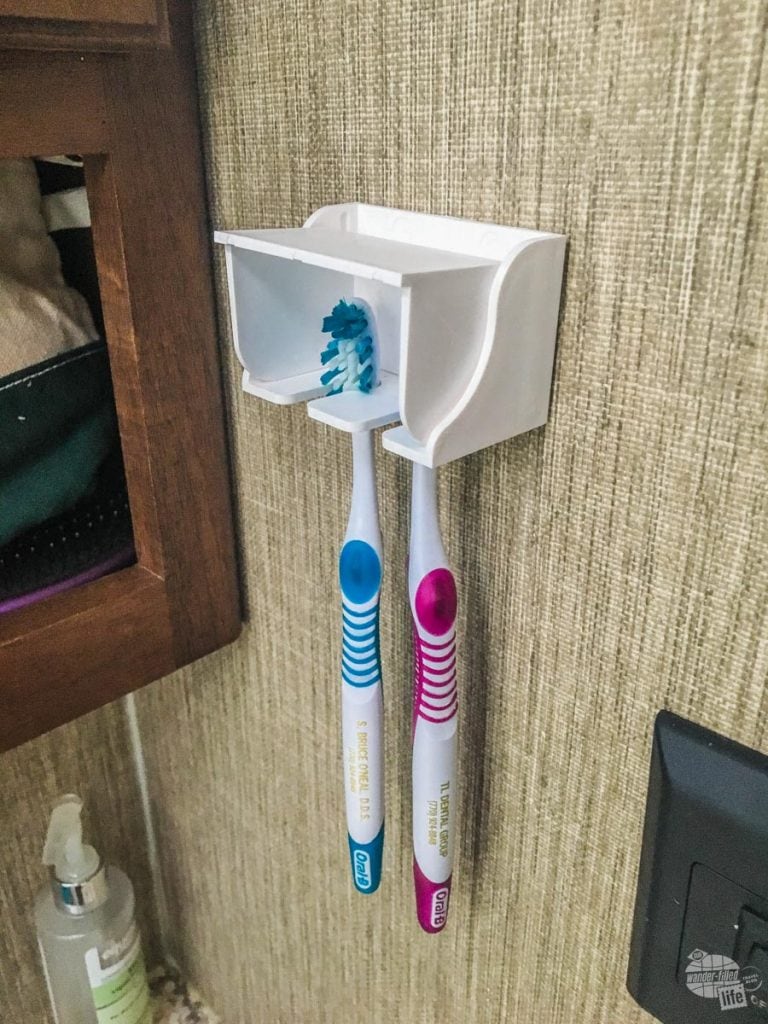
Toothbrush Holder
Another easy way to save on counter space is a toothbrush holder. This one works well for us, though you may have to replace the adhesive after a while.

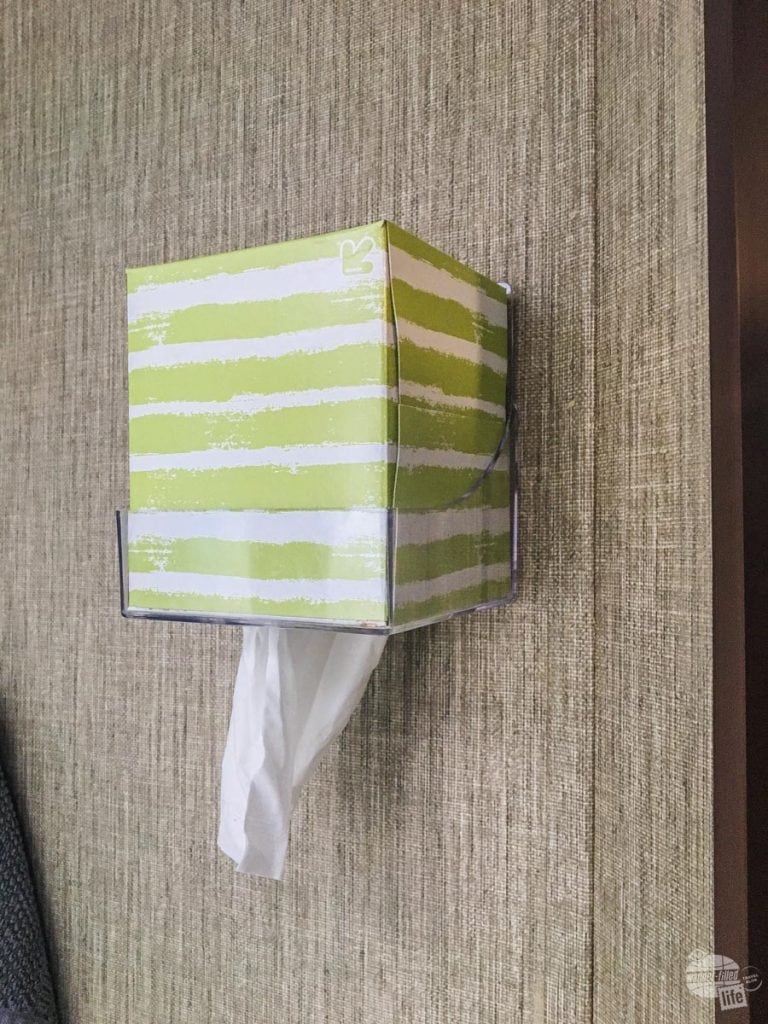
Tissue Holder
My wife uses tissues like there is no tomorrow and this tissue box holder saves on serious counter space in the bathroom. Even she initially thought this was a somewhat frivolous purchase but has come to really appreciate this little space-saving device.

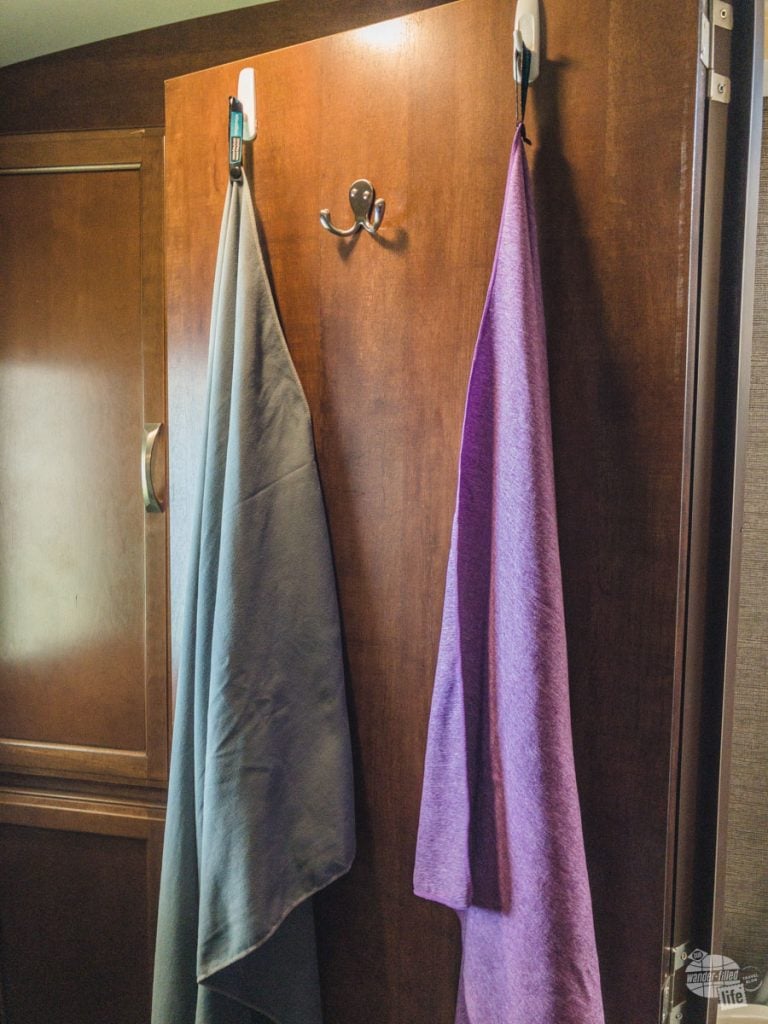
Towels
We started out using cotton towels from Ikea, which have hanging loops and dry ok, but if it is a driving day or a rainy day outside and they are cooped up in the bathroom all day, they can get a bit musty.
So, we got microfiber towels like these and they are great. They dry quicker without having to be hung outside. The towels
Toiletries
I suggest keeping a second set of toiletries in the camper, as practical. The less you have to pack, the more time you can spend enjoying your camper. That said, some items just won’t store well in extreme heat or cold, so use your best judgment here.
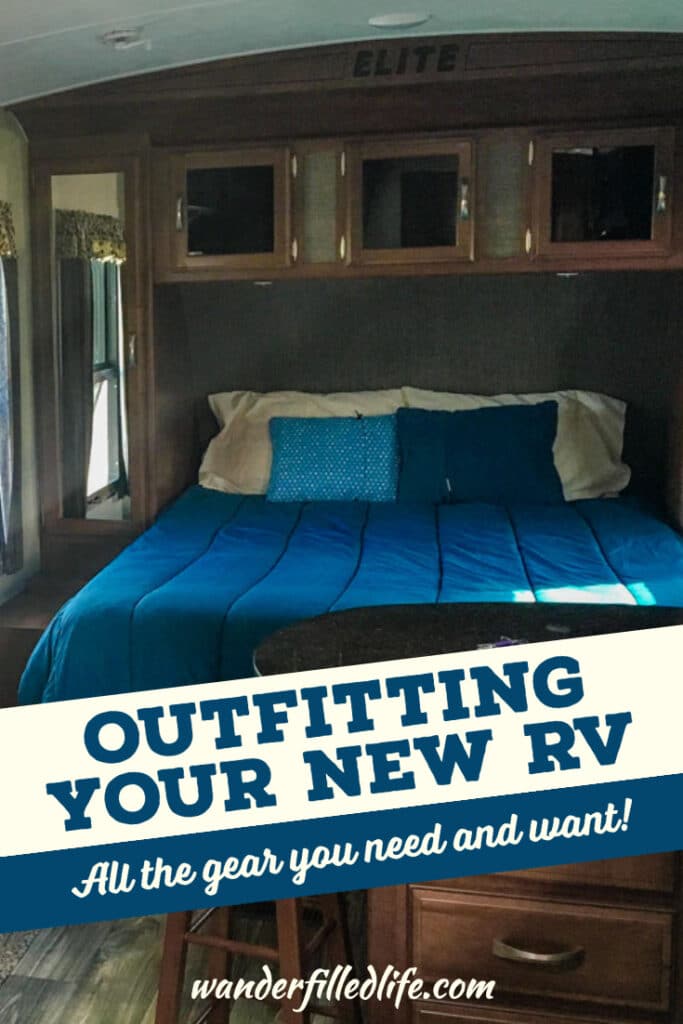
Bedding
You will need bedding appropriate to your bed. Some RV beds are custom-sized, so make sure you know your bed size before you get anything.
Having a set of sheets, pillows and a comforter ready to go for your camper definitely cuts down on the prep time for each trip. Again, your time camping is worth more than the additional expense of bedding.
If you live in an area near Ikea, you can get quality sheets and bedding for a cheap price. Remember, you want your bed in your camper to be as comfortable as possible. Otherwise, what’s the point?
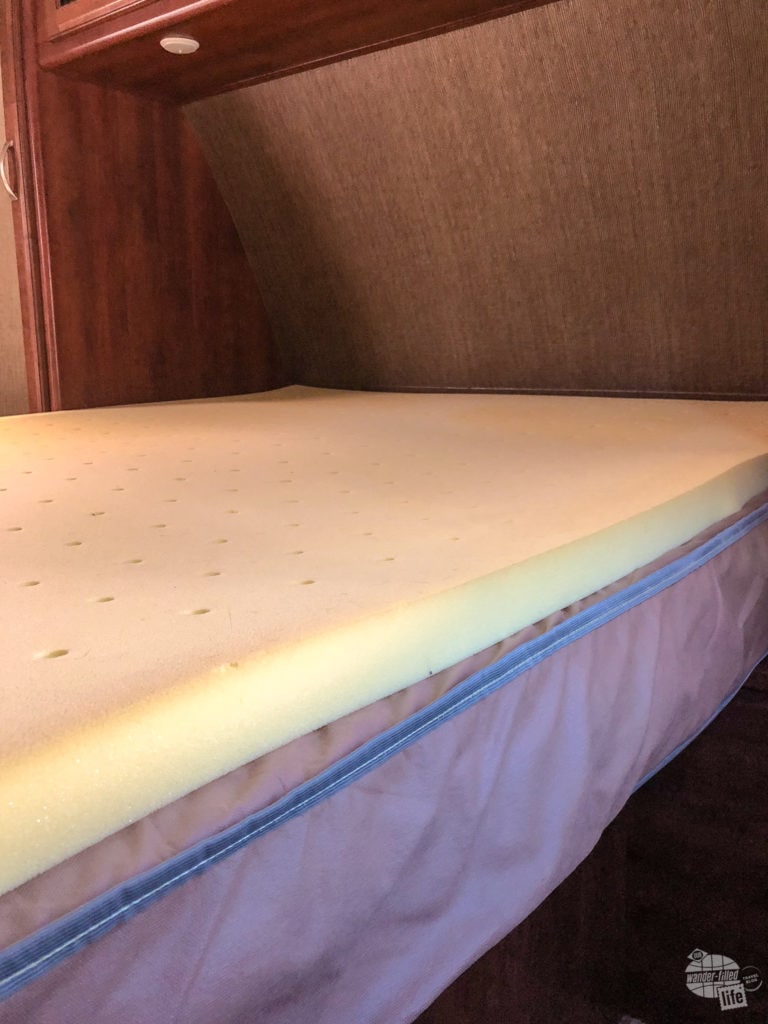
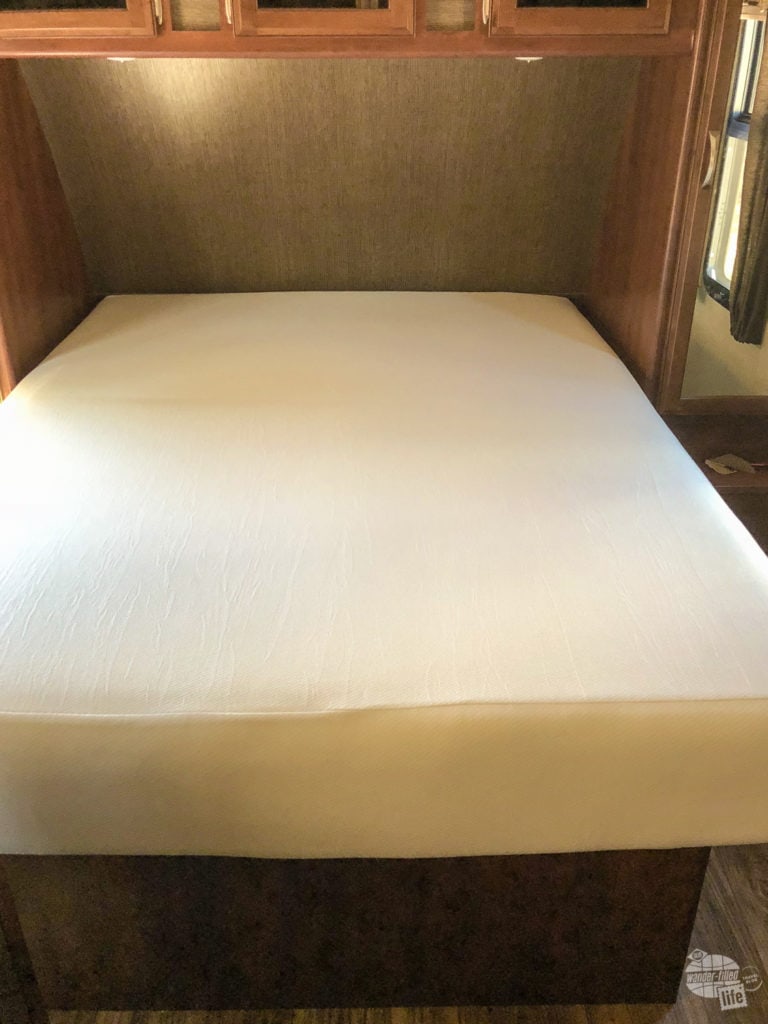
Mattress and Mattress Pad
The mattress that came with our camper was awful. It was quite thin and offered no support whatsoever. So much so that we bought a mattress topper online before we finished our first weekend with it.
We found a great memory foam mattress topper on Amazon and it kept us going for two summers.
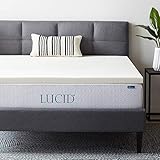
After two years, we bought a mattress on Amazon. It was a bit of a risk since we like to try a mattress out before we buy it, but the price and the reviews convinced us.
The new mattress is great (at least for me). I like it a LOT better than the Tempur-Pedic we had at home. It is firm, but not overly so. Bonnie would love if it were about 10% softer but, for the money, it can’t be beaten. Indeed, we ended up replacing our too-soft Tempur-Pedic mattress at home with another one of these mattresses.

Other Gear For Outfitting the Interior of Your Camper
Heater and Fan
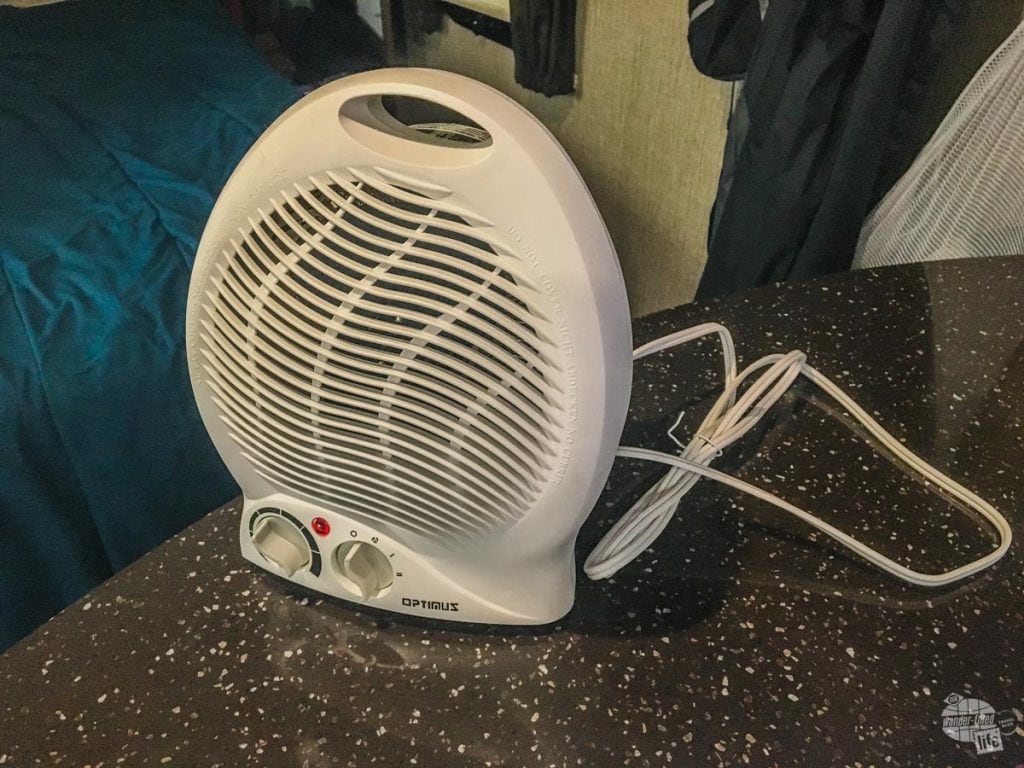
Propane is expensive. One of the first pieces of advice we received for our camper was to buy a small, electric space heater instead of using the furnace on cool nights. This one is relatively small and works like a charm.

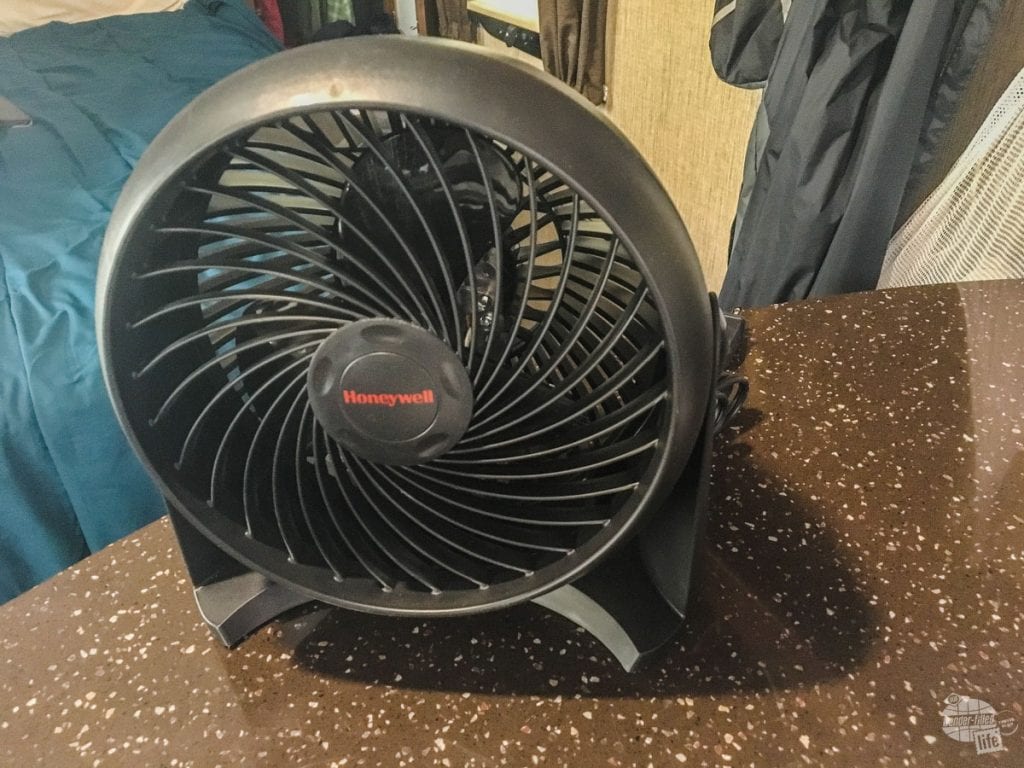
While the AC system has a fan that can be set to always on and blowing air, it is pretty loud, so we bought a small fan to use at night or outside. It is quiet and the lowest setting makes for a nice cool breeze.

If you are going to be using the Ryobi One+ system, you might want to just get the Ryobi fan. You can operate it with a battery or an extension cord. If I were only going to get one fan, I would get the Ryobi model because of its flexibility. That said, this one is quieter and has more settings.
Power Strip
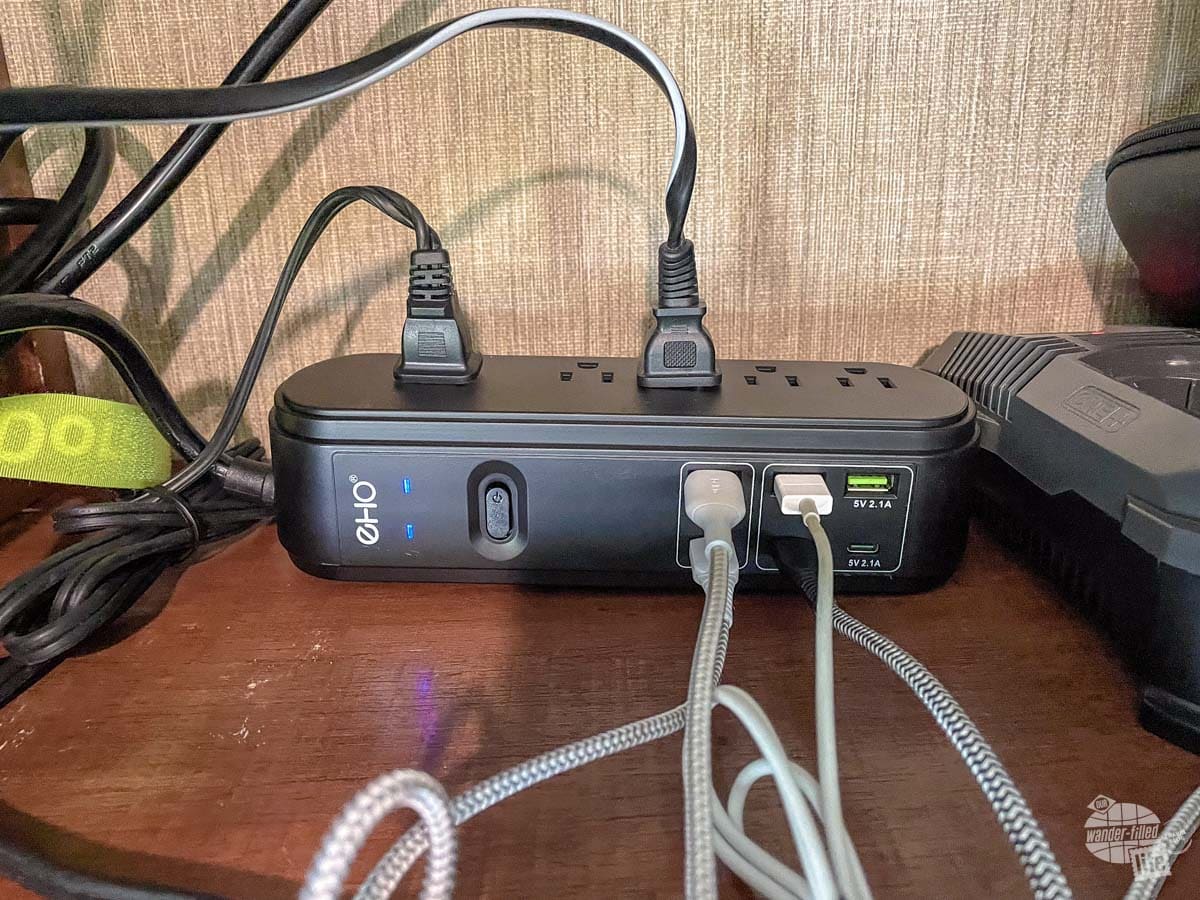
If you are anything like Bonnie and I, you have a plethora of things that need recharging or power. I recently upgraded to this power strip as an electrical hub for the camper. Behind the TV mount in our camper is a decent-sized cabinet area with an outlet.
This power strip sits back there with chargers or cables for our iPads, iPhones, Apple Watches, drill battery and Fire Stick.
The reason I like this particular power strip for all of those applications is the six USB ports, including three USB C ports with up to 40 watts of power delivery.


Amazon Fire Stick
I used to take an Apple TV with me as well but now Fire Sticks have just about every app you can find on an Apple TV, including Apple TV+. There is just simply no reason to take an Apple TV now. The best part about a Fire Stick is you can sign into web-based WiFi login prompts at campgrounds.


Zip Ties and Velcro Straps
All of those electric cables, plus a dozen other things, will need tying down. Get some zip ties in various sizes and make your life less cluttered, cable-wise.

The other thing you will need (trust me on this!) is velcro straps. These get a ton of use in our camper.
Extra Fuses
Eventually, a fuse will blow on your camper and you will need to replace it. Check your electrical system to see if you need more or less of any particular fuse type, but this is a pretty good variety of fuses for your camper.

Command Hooks
Get a bunch of these. Trust me, you will want to hang things like your keys, towels, coats, hats, etc. in different parts of your camper.

One Last Essential for Outfitting Your New RV: Our Book
So, you have gotten everything you need for your camper and are ready to hit the road? But where are you going to go? We have you covered there too!
Our new book, Moon USA RV Adventures, has 25 routes across the country with everything you need for a great trip, including where to go, how to get there, where to stay, what to eat and what to do when you get there.
Seriously, we take all of the leg work out of planning an outstanding RV trip!
- Sinclair, Bonnie (Author)
- English (Publication Language)
- 560 Pages – 02/28/2023 (Publication Date) – Moon Travel (Publisher)
Final Thoughts on Outfitting a New RV
Like I said at the beginning: welcome to a great community! We hope you have found this list helpful and if you have any questions or comments, feel free to drop us a line!
I know this article is focused primarily on travel trailers and that different types of campers have different needs. But we also know, for a lot of folks, a travel trailer is their first camper. It was for us back in 2016. Since then, we have visited 48 of 50 states with our camper (we have been to the other two states, just not in our camper). So, when you read about this gear, this is the stuff we use on the road… Otherwise, we wouldn’t recommend it!
Pro Tip: Every camper is different and you are sure to find several things unique to your camper that you need on your first, second or even third time out. I suggest staying somewhat near a Wal-Mart for the first couple of trips while you work out all the kinks. Don’t worry! It gets better.
Again, we are so glad you have joined the RV community and we look forward to seeing you on the road!
We invite you to join our Facebook group, USA RV Adventures. This group is for experienced, newbie and wannabe RVers to discuss RV destinations, itineraries and camping/travel tips.
Travel Resources
What do you use to find a flight?
We use Skyscanner to find deals on flights. Skyscanner has a great interface and compares tons of airlines for the best pricing and routing. That said, it does not always have every airline and some airlines will have better deals on their website. Still, Skyscanner is a great place to start.
Click here to search for a flight.
What do you use to find a hotel?
We typically stay at Hilton properties, so we use the Hilton website. You can find good Hilton Honors discounts or AAA discounts for a hotel there. We make great use of our free night certificates from our Hilton Honors American Express.
Click here to book a Hilton property.
If there are no Hilton properties available, we use TripAdvisor to read reviews and book the hotel. We find we can get the best price that way.
Click here to search for a hotel.
We recently partnered with Stay22 to add interactive maps to each of our destination posts. This will allow you to see a plethora of hotels and vacation rentals all in one responsive map of the area.
What if I need more space than I can get at a hotel?
We use Vrbo for the times when we have rented a cabin for a weekend getaway, like this cabin in Townsend, TN, or needed to rent a house for a large family vacation. We had a great experience with them in terms of refunding deposits when COVID hit and will continue to use them.
Click here to search for a vacation rental.
Who do you use for rental cars?
As a general rule, we book with Hertz for rental cars. We have had nothing but good experiences with them. Plus, we really like unlimited mileage and not worrying about crossing state lines. We have even rented from Hertz overseas in both Slovenia and Croatia.
Click here to book a rental car.
How about booking a cruise?
We have found some amazing prices for booking a cruise through Cruise Direct. We have saved a lot of money on our cruises compared to what we found elsewhere, making a last-minute Bahamas cruise even cheaper.
Click here to book a cruise.
What if I want to rent an RV?
We highly recommend Outdoorsy for RV rentals. We rented a camper van for a week to visit Rocky Mountain National Park for the elk rut and Custer State Park for the Buffalo Round-Up and had a blast. The program was easy to use and we really enjoyed the freedom of having a camper van for that trip.
Click here to rent an RV.
What do you use for booking tours?
We don’t often book tours. Typically, we like to do stuff on our own. That said, there are some experiences you can’t have any other way. So, when we do want to book a tour, we always check Viator first.
Click here to book a tour.
Do you use anything to get discounts on the road?
We make extensive use of both Good Sam and AAA on the road. Good Sam is normally regarded as a discount card for RVers at campgrounds and Camping World but anyone can use the 5 cents off a gallon at the pump at both Pilot and Flying J.
Click here to get a Good Sam membership.
We have had AAA as long as we have been married and it has more than paid for itself in discounts at hotels, aside from the peace of mind of having roadside assistance. Add in paper maps and the ability to get an international driver’s license and it is more than worth it for any traveler out there.
Click here to get a AAA membership.

We just purchased our first travel trailer. This is excellent info.
Thank you! Welcome to a great community. Please let us know if you have any questions. We are more than happy to help.
I am a single senior lady who just bought my first travel trailer. I wish there were classes for new RVers. Although I got the basics, I have so much to learn before next summer. After two short trips out, I’m still trying to figure it all out.
Thanks for the tips!
Hi Mary,
We agree and I think you just inspired an article from us: Travel Trailer 101. Look for it soon!
Excellent info thank you???
Went through this a year ago. No argument on your suggestions. However, I couldn’t handle the hooking and unhook ingredients, in and out, etc. I just bought a Class C and took delivery yesterday. I set both with solar, satellite, lithium ion house battery and a 4in. bed topper. Yes, a little more investment, but it sure makes life on the road a whole lot better and more comfortable. Also, I have a multitude of self-locking plastic boxes in different sizes that I got at Walmart to store anything and everything. Also, I have a shoe cleaner that sits right by the stairs. Enjoyed your article and it is spot on!
Fred, I have to say I am more than a bit jealous of the solar system you have in your Class C… That is one of my planned upgrades for our camper. We just bought a mattress for our camper and we will update the recommendations once we try it out. It was less than $200 on Amazon for a queen, so not a bad price.
Thanks so much for the recommendation on the shoe cleaner. That is a really good idea. I will have to add that to our camper and the list!
What mattress did you buy? Do you like it?
We bought the Live and Sleep Resort Sleep Classic (https://amzn.to/2kcwmYI …that’s an affiliate link). We have only slept on it for two nights, but we love it so far! Our next road trip will start in just a couple of weeks…we’ll post more on the mattress once we’ve slept on it for a few more nights.
Thank you so much for compiling this list. I wish I would’ve found this at the time we bought our trailer last year…. I believe we have everything on this list now or at least pretty close. The only difference is that it took many YouTube videos and research to find all of this stuff and get it in my trailer. These are all very good ideas and products that you are suggesting. Happy Camping.
Thanks so much Luis!
Thanks so much for this list. We just bought a 27 ft pull behind, picking it up in a week… and there are a few things I would have never thought about. Like the water pressure regulator and filter. Thanks for compiling all this info.
Your dealer should have told you about a water pressure regulator and so many other things here!! Unless you bought your trailer from a private party, I’d avoid your dealer for lack of the above advice…
We certainly agree any good RV dealership should walk you through and ours did, but it was a ton of information. That’s one of the reasons we wrote this article… To put that information in an easy-to-access and re-access place.
This list is great for my husband doing his set up thing, I went searching for outfitting the interior, do you have such an article, is there a Part 2? At the age of 70, and 48 years of marriage, my husband finally got senile enough–ha ha–to give in and let me start camping. He has a large touring BMW motorcycle and I knew toy hauler/camper would sweeten the pot. First, we bought our first pick-up truck and I get to drive it around town. Some friends are envious but not many. It was fully equipped for towing what we planned to buy. We are minimalist, we got a toy hauler/camper trailer. We are ignorant and innocent as babes in the woods. The camper package is very generous, hoses and cords are included and the ultimate selling point was electric levelers and they “threw in” the sway bar. When we pick it up and they demo it I’m going to use your list to check which items we still need to make this undertaking as easy for the Mr. as possible. Also, that interior outfitting list for me—kitchen, bathroom, bedroom–at least what I can’t get along without at first until I decide what our needs are. Thank you, I’m going to add your site to Favorites.
Thanks so much!
You can find the link to part 2 here: https://www.wanderfilledlife.com/outfitting-new-rv-inside-gear/
Please let us know if we can help in any way!
I inherited a trailer from my dad, and am trying to figure out how to outfit it to meet our needs. Your site provided me with excellent information. THANK YOU SO MUCH!
So glad we could help! Please let us know if you have any other questions!
.Thank you.
Thank you! Great article. We just bought a class c rv and have never camped. This is so helpful and have used the links to buy several items. Now on to read part two.
Thanks so much! Please let us know if there are any questions we can help answer!
As for the mosquitos and other pesky little flying biters, have you tried Tea Tree Oil? It will even keep gnats away, believe it or not! I usually mix it in lotion and put it on that way. It may burn a bit if you do not put it in some type of carrier product like lotion or baby oil or coconut oil. Also, you can get Tea Tree oil conditioner and use that as a lotion or rub it in your dry hair and do not wash it out until you are ready to head in for the night. It has a strong, but clean and earthy smell and the bugs do not like it.
Thanks so much for the suggestion!
It¡¦s really a great and helpful piece of information. I¡¦m satisfied that you shared this helpful information with us. Please keep us informed like this. Thank you for sharing.
Great article glad I came across it. It has given me some ideas that i did not think about but i do have one other suggestion for you though. When looking for ideas on leveling my travel trailer i came across levelers made by anderson that are shaped like curved wedges that you basically just drive up on and chock and camper is leveled. No need for all those blocks. thanks again for this article headed over to read the inside one now.
Thanks so much Dale! We have looked at those… They look really awesome.
My husband and I recently retired and purchased a 26 ft pull trailer for travel. The solar panels he purchased from harbor freight have been a great asset for a power option.
I will have to check those out!
Great article, however, my husband has one more suggestion- a padded kneeler. When he has to crawl under the slide-out to drain the gray water and black water tanks, it’s murder to have to kneel in the gravel!
Great idea Karen!
Thanks Grant! I’ve been doing this for years, but reading this article, I’m going to add a couple of things to my kit.
I’ve found it handy to have a nail bar in my tool kit to pull stakes up from anchoring my pop-up. I also carry a military style folding shovel and a small landscaping rake as well.
James, those are great suggestions!
We just purchased our first camper and you have a great list of information here, thanks for the help.
Lora,
Our pleasure! If you have any questions, feel free to ask!
I need to to thank you for this excellent read!! I absolutely enjoyed every little bit of it.
I’ve got you bookmarked to look at new stuff you post!
Thanks Georgiana!
I love what you guys are usually up too. This type of clever
work and exposure! Keep up the great works guys I’ve included you guys to my
personal blogroll.
Thanks Christin!
Great article. I’m buying everything on your list. Well I’m going to try to get the dealership to through in some!
Thanks so much! Let us know if you have any questions!
Howdy! Someone in my Facebook group shared this website with us so I came to look it over.
I’m definitely enjoying the information. I’m book-marking and will be tweeting
this to my followers! Great blog and wonderful design and style.
Thanks so much!
Hi There! Thank you both so much for all the effort you have put into this article. We are pretty much newbies. Have done a lot of tent camping, boat camping, and had a solid side pop up trailer for a while, but that’s many years ago. Now we are close to purchasing a new travel trailer. This information you have provided is a huge help. We have been out of the camping thing for so long that everything is new for us again.
Cheers
John.
Thanks John!
Please let us know if you have any questions!